ADUs as Affordable Housing

For many people, the dream of owning a home is becoming harder and harder to achieve. But there is one solution that could provide more affordable housing options: ADUs. ADUs, or accessory dwelling units, are small apartments or homes that can be attached to or built beside a primary residence. And they could be part of the solution to our affordable housing crisis. They go by many names including: backyard cottage, carriage house, guest house, or even mother in law suite or granny flat. Regardless of what they are called these provide an opportunity to create new homes in our communities and provide affordable places for people to live.

There are many benefits of ADUs. They provide more affordable housing for homeowners, help seniors stay in their homes longer, and create more opportunities for shared living arrangements. They can also be an important source of income for property owners, often allowing people to afford to purchase their first home. We have found that there are three primary reasons people have come to us to start their ADU projects: building a rental unit to generate income and increase their property value, create a place for an aging family member to live, or to downsize their home while staying in the neighborhood they love while renting out the main house.

Policy

Beyond homeowners, many towns, cities, and states are looking at ADUs as one piece of the puzzle to address some of the housing issues facing our communities. Governments are enacting new policies to allow ADUs by right, make ADUs easier to permit, and open up new opportunities for ADUs to be added to a wider range of properties. These policies take many shapes from zoning code updates to incentives for homeowners to build ADUs. Some places, like Oregon, Washington, California and other states have passed laws to allow ADUs on any residential properties state wide. In California, they have taken a further step to try to make ADUs more affordable to build by providing grants for homeowners to help cover some of the costs of designing and permitting these projects.

Beyond the states that have already adopted ADU specific codes and regulations, many states are actively working on implimenting new policies to allow accessory dwelling units. New York State has a bill going through their legislature that would legalize ADUs statewide - mandating that each town/city/county add code language that allows ADUs. While many cities across the country are also adding ADU language to their zoning code.

It is clear that these projects are growing in popularity and our government representatives are hearing from homeowners in their jurisdictions who want more flexibility to add ADUs to their properties.

Affordable Housing

Although ADUs can be naturally affordable regardless of who builds it since there is no cost for the land, they are also becoming a tool governments and non profits are using to create subsidized affordable housing. For example, Portland, Oregon is allowing more than one ADU per property if one of the units is designated as a permanently affordable rental unit. This incentive is encouraging developers and homeowners to build subsidized affordable units.

Many affordable housing non-profits are also looking at ADUs as a way to increase their housing portfolio. Often community development corporations own single family homes and rent them out below market rate. ADUs allow them to add additional units to these residential properties, creating new affordable units.

There has also been experiments where cities or counties have financed the construction of ADUs on private properties, using these units as affordable or transitional housing for a set period of time, after which the land owner will own the ADU. Basically, a homeowner donates the land for a fixed time period - often around 10 years - and the city builds the ADU and offers it to someone in need. After the time period is up, the landowner takes ownership of the ADU and can rent it out themselves. This is an intriguing way to incentivize the creation of ADUs as affordable housing while making it accessible to those that may own a property but don’t have the capital or access to financing to build an ADU on their own.

Naturally Affordable

One of the best aspects of ADUs when it comes to creating affordable homes is that the land isn’t a development cost. Since homeowners already own the land, adding an accessory dwelling unit only costs the fees associated with design, permitting, and construction. This makes them naturally affordable compared to most other types of housing.

Rental Income Can Make Housing More Affordable

The other big benefit of ADUs is they can make purchasing a home more affordable for more people. If you are a young professional looking to purchase a home, finding a property with an ADU that you could rent out, could allow you to afford a property you may otherwise not have been able to. Or if you can look at properties that could easily add an ADU - like renovating the basement into a JADU or it has a backyard that could accommodate a detached unit - you may be able to stretch your budget knowing you could create another unit that would generate rental income to help offset the mortgage expenses.

Financing

Building an accessory dwelling unit is not cheap. They are significant investments and can easily cost hundreds of thousands of dollars. Financing for these projects typically takes the form of home equity line of credits or cash-out refinancing for those who don’t have the cash on hand to cover the cost of design, permitting, and construction. However, this isn’t available to every homeowner out there. Most lower or middle class families don’t have the cash available or the equity in their properties to cover the cost of an ADU.

This challenge is another place that governments and non-profits are working to address to make more ADUs and thus add affordable homes. Places like California are introducing a grant program to cover up-front soft costs for ADUs. Other places are working on creating public-private partnerships to allow more diverse loan options to help finance these projects. And like we mentioned above, some governments are even covering the cost of building the ADU in exchange for using the ADU as affordable housing for a set period of time.

It is important that more attention is paid to how much these projects cost and ways to make the money necessary to build ADUs more accessible to a wider range of homeowners. I personally would love to see it possible to finance ADUs through a typical construction loan or mortgage product.


New Construction ADUs vs Garage Conversion ADUs

We frequently get contacted by people looking to add a wide range of ADUs types, but the two most common are new construction detached ADUs, and Garage Conversion ADUs. This seems to be the case in almost every town and city that allows accessory dwelling units. People who have garages in place think converting them to a rental unit would be a great option. While others hope to build an detached ADU in their backyards. Here we will discuss some of pros and cons of both of these ADU types and ultimately why we recommend going with new construction rather than converting garages for most properties.

New Construction ADUs

Ease

If you are thinking of adding and ADU to your property, Detached ADUs (sometimes shortened to DADU) are by far the easiest path forward. It is always more challenging to work within existing conditions and going with a detached ADU also gives you the most flexibility with the design and layout. New construction allows the design team to respond to the unique aspects of your site and the specifics of what you want your ADU to look like and accommodate. It is the easiest option for designers and builders and probably the best option for you to get exactly what you want.

Quality

Today’s construction techniques and consideration of modern building science can give you a high quality ADU that is efficient and sustainable. In almost all cases this will result in a higher quality project than working within an old garage that probably wasn’t built to today’s codes or standards. From increased insulation, to tighter building envelops, building new will give you the highest quality end result.

Flexibility

Alluded to in the ease section above, detached ADUs often give you the most flexibility when it comes to size, height, form, and layout. They can be designed custom for your property and the end use of the ADU. The size isn’t restricted to fitting within an existing structure so is only limited by the local regulations for ADU size. Same for style. Detached ADUs can range in style from traditional to modern and designing a custom detached project gives you the most flexibility.

Cost

Many people will say that you can save money by converting an existing structure rather than building new. Although this may be the case in some specific circumstances, for the most part we have found that the cost often ends up the same and sometimes conversions actually cost more. It is complicated working within existing spaces, and often there are specific requirements to bring older structures up to today’s codes, which can be incredibly costly. Making sure that the foundations are sound, insulation requirements are met, and utilities can reach the right locations can be much harder when working within an old garage or basement. Building a new construction detached ADU could potentially be a more affordable option.

Start with a Pre-Designed ADU Plan

With a detached ADU you have multiple options for how to move forward with the design. You have the option of going with a fully custom design that is specific to your needs and property. You also could start with Pre-Designed ADU Plans like the ones we sell on this site. This option could save you a lot of time and money. ADU Plans aren’t right for everyone, but if you are looking to keep cost down and are willing to stick to the designs available it could be a great option.

Increased value

Converting existing space, be it a garage or basement, doesn’t really add more usable space to your property. In many cases it is replacing one use with another - you may gain a rentable unit but lose storage or parking. To maximize the increased property value of adding an ADU a new construction detached ADU may be the best option. It gives you a new asset while maintaining the use of those other spaces. Further, depending on the jurisdiction you may be able to add a detached ADU as well as convert a basement into a JADU, giving you three units on one property. Our point here is that adding a detached ADU gives you the most potential to maximize the use of your property and increase the value.

Garage Conversion ADUs

Complex

Converting existing spaces is complex as you are constrained by space and access. It is harder to achieve structural requirements like seismic bracing or energy code requirements for insulation as two examples. Often these and other requirements result in almost rebuilding the whole structure, negating any potential savings. In other cases, conversions may be more labor intensive for things like foundation repairs or slab demo and re-pours than they would be on a new construction project. The added labor cost often negates any potential savings of using the existing structure to reduce material costs. Both the design and construction of garage conversion ADUs are complex and typically more complicated than most people assume when the consider this option.

Limited size

If you are going to invest a significant amount of money on an ADU project, it makes financial sense to maximize the size. You will get a greater return on the investment with a larger ADU - either through increased rental income or higher property value increase. However, converting a garage inherently limits the size of your ADU as you are stuck working within an existing footprint. Further, garage dimensions are set to be an efficient way to park a car, not as an efficient use of space for living. One car garages can maybe fit a tight studio apartment while a two-car garage could potentially accommodate a one bedroom unit. However, both are limiting in terms of potential use and rental potential. You will get a better layout and more space if you skip the conversion and just go with a detached new construction ADU.

Cost

As discussed above, but worth repeating here, we have found through years and years of experience that converting garages are not nearly the savings that most people assume. Most garages are old and in disrepair. Very seldom are the siding or roof worth keeping and most often the foundations and slab are not up to codes for living spaces. Working within an existing structure can also dramatically increase the labor time as it limits access for machines and equipment. Once you factor in all the required upgrades and code requirements it often means you are basically rebuilding the whole structure anyway, but arbitrarily limiting the size and footprint of your ADU. And the fees for doing a custom design would be higher than if you started with pre-designed plans for a detached ADU. The cost savings, if there is any at all, is not worth the limitations.

Custom design

You can’t do pre-designed solutions for garages or other conversions. There are too many custom requirements and details needed that you will have to hire a design team to do a custom solution. This eliminates the ability to use pre-designed plans. Although custom design often can lead to the best result for the specifics of your property, it is definitely a more expensive path than starting with an ADU design that is already completed.

Property value

By converting a garage you gain an ADU but in the process you lose a garage. Overall this may end up adding some value to the property, but you are subtracting one asset to add another. To maximize the value of the property it is better to add a new ADU.

Our Recommendation

Based on almost 10 years of experience working on ADU projects, we have some strong opinions on the best way to get a high quality project. For most people going with a new construction ADU will give you the best result. New Construction offers the most design flexibility to get what you want, it can add the most value to your property, and it can lead to better quality construction and a higher performance building. Although for some properties a garage conversion may make sense or may be the only option, for the vast majority of people looking to add an ADU to their property, we highly recommending choosing to go with a new construction Detached ADU, whether it is a predesigned ADU Plan or going with a fully custom design.

The Butterfly ADU on Bainbridge Island

The Butterfly ADU is tucked behind a house on Bainbridge Island, across the sound from Seattle, Washington. The detached ADU was customized to take advantage of views over the backyard garden, preserve privacy between the ADU and main house, and is sited to allow for solar panels to be added to the south facing roofs.

Design Process: Additional Services

We have outlined the general phases of the design process in earlier posts. However, there often are other services that we offer to make your project easier to achieve. None of these are required to get an ADU designed, permitted, and built, but some can make your project a greater success or take some work off your plate so you can focus on other things. Additional services for ADUs or Custom Homes allow us to customize the service offerings to the unique needs of each client and each project.

Property Search and analysis (Feasibility Study)

You are looking into buying a new home and want to know what the potential is to add an ADU as a rental unit. Or perhaps you want to analyze your current property to better understand the opportunities and challenges for adding an accessory dwelling unit or other property improvement project - like a major addition, remodel, or even a new custom home design. It is also a great idea to do a feasibility study when considering purchasing of a piece of land. If you are considering any of these options a feasibility study is highly recommended as the first step. Whether you hire us or engage another design team, it is worth investing in this preliminary research before you commit to a larger project or before you close on a property purchase. Zoning research, site analysis, property review, and other research is can save significant money or prevent you from beginning a project before knowing exactly what is allowed. Whether you are considering an ADU, a major remodel, or a custom home design, this is a valuable service that is worth the upfront investment.

Interior Design

Some clients love shopping for materials, finishes, appliances, and picking out colors and other interior elements for their homes and ADUs. Others don’t have the time and want someone to assist with this process. Since most interior finish selections don’t affect the permitting process this service isn’t necessary to get a custom home or ADU approved to build, but it can make a big difference for the look and feel of your project. An interior design that matches the aesthetics of the exterior and creates a welcoming environment can make or break your project. And interior design is especially important if you are planning to rent out the ADU as a long or short term rental. You want durable materials and finishes as well as a noteworthy, photogenic design that will set your rental apart from the competition. This service can include selecting all of the finishes like tile, counters, cabinets, fixtures, and hardware or can include additional tasks like helping select furniture, artwork, and other decorations to bring the space together and feel warm and inviting. Custom home and ADU Interior Design can take a great deal of time and effort but can have a great return on investment. This is why we recommend that our clients hire a professional designer to assist with this work. Typically we like to work with you to at least select all of the materials, finishes, and fixtures that will be attached to the structure which is why we offer interior design as an additional service for our ADU and custom residential clients.

Existing Conditions Drawings (As-Builts)

Most of the projects we work on are detached new construction ADUs or custom residences. However, when an ADU interacts with an existing structure on your property it is necessary to document the existing conditions. Often these are called as-built drawings, and include creating dimensioned drawings of all the existing spaces and structures that will be affected by the project. Most designers will offer this service or sub-contract it out to another drafting company. It is worth the investment to get an accurate drawing set that shows the current conditions of your home before you start any project.

Renderings

Three dimensional views of the project are another part of the design process that isn’t necessary for the permit approval process but can be a great tool to make design decisions. Taking these views a step further, you can use modeling and drawing software to create rendered views that show materials, finishes, lighting, furniture, people and other effects to really show what the spaces will look and feel like. We often do a couple exterior and a couple interior renderings so our clients can see an approximation of what their project will look like after it is finished. This allows them to have the confidence they will like the final design prior to starting construction. Good renderings do take time and thus cost money, but we always find it is worth spending a bit of extra effort during the design phase to prevent changes or worse, regrets, once construction begins. A couple thousand dollars during design can save tens of thousands during construction. If you are unsure about what your project will look like or how the interior spaces will feel by looking only at plans, sections, and elevations, ask your design team to make some renderings. It is an added service but can give you a better sense of the final project plus are great to share with friends and family so they can see what you are planning!

Physical Models

These are pretty rare these days as most firms have moved to digital drafting and 3D visualization software. However, some clients think better when seeing a physical model of their new home or ADU. We have built a few models for clients and they can be a valuable tool to help make design decisions. They can be time consuming if you are looking for a lot of detail. Simple massing models, or chipboard diagrammatic models can be quick and cheap, but detailed wood models can be very time consuming and could add significant cost to the design process. Still, like with the renderings, it is still cheaper to invest in the design process than try to make changes once construction begins. It is better to be sure about the design direction and sometimes physical models are the best way to think through a design challenge or capitalize on an opportunity.

Meetings and Presentations: Design Review, Community Engagement, Neighborhood Associations, Historic Review, and other meetings or presentations.

Certification Process & Applications: LEED, Earth Advantage, Passive House, Net Zero, or other certifications.


Design Process: Phase 5 - Construction Administration

It is common to think that when the approved permits are in hand and construction can begin, that the services of a designer are no longer needed. Hopefully this post convinces you otherwise. I would argue that designer’s involvement in what is called Construction Administration, is one of the most important and valuable aspects of our services. This is why we don’t take on projects that don’t have a base level of services during the construction phase. It is the only way we can best serve our clients and work together with the contractor to deliver a high-quality project that meets the design intent.

What is construction administration?

Construction administration, often abbreviated as “CA,” is a series of meetings and administrative tasks that the designer undertakes to help oversee the construction phase of the project. The goal is for us to help the general contractor interpret the construction documents correctly, translate these design drawings into the built home, and troubleshoot any problems or situations that may occur. We work closely with the contractors and clients to help deliver a high-quality end result.

Typically CA work includes regular meetings on site with the contractor and owner. Often these are at regular interviews like monthly or weekly site meetings, while on some projects we may select key times to do site visits based on the construction schedule - like before pouring concrete, after framing is complete, before drywall is hung, etc.

Is Construction Administration worth the added cost?

Too often clients think that they will save money but declining to have the designer involved in the project once the permitted plans are received. They see CA as an added cost rather than an integral part of the designer’s services. Perhaps they see this as saving money to keep project costs down. However, construction administration is not an added cost and more importantly it can save thousands of dollars and help keep your project on budget.

A basic level of CA is included in our design fees for every project and isn’t a service that can be declined. Once a project breaks ground using our design drawings we must remain involved for liability reasons as well as to allow us to help deliver a project that meets our client’s expectations. As most designers and contractors already know, it is rare that a set of plans is perfect with all of the details, specifications, and information perfectly coordinated with the existing conditions on the site. There are always unexpected changes, alterations, and various interpretations that are needed to be clarified when translating two dimensional drawings into a three dimensional building. Not only are the drawings not perfect, but often clients make last minute decisions or changes that may affect the permitted drawings, or the construction process. We are there to help work through these, minimize delays, and get any additional approvals needed to continue the work.

Designers work to help resolve issues, work through design revisions, and solve unexpected construction hiccups. It is always easier and cheaper to make changes on paper, before you build something in the field. Having the designers available to work through detail drawings, find replacement material selections, or work with the clients to make last minute design changes can save thousands of dollars and help keep the project on schedule.

What are the tasks that designers perform as part of construction administration?  

Along with the site meetings we briefly mentioned above, designers also take on some administrative tasks and help communicate important information to the General Contractors building your project.

Let’s start with expanding on site meetings. Typically we want to schedule regular monthly meetings on site with the General Contractor to observe progress and get ahead of the construction process by answering questions and providing any additional information the builders may need that isn’t in the drawings. These meetings typically take an hour or two as we go over what work has been complete, what work is scheduled for the upcoming month of work, and what information the contractor needs to keep the project on track.

Beyond the site meetings, the designer is on call to clarify questions or provide additional drawings or information. Called Requests for Information (RFIs), the General Contractor makes formal requests for information from the design team. Depending on the request, the designer may create new drawings or revise the existing ones and coordinate any changes to the approved permit drawings if a major revision is needed. Revisions may need to be resubmitted to the building department so it is important to include the designer if any deviation from the originally permitted design is made while building.

Why can’t the builder manage the construction administration process? 

The builder’s role is to take the permitted construction documents and turn the drawings into the built project. However, they are only translating the drawings and haven’t been thinking through the design and code issues for as long as the design team. At this point we have probably spent 6-12 months with the clients, working through different ideas, laying out the ideal floor plans, selecting the materials, and developing the details needed to give the contractor the right directions on what to build, and also to obtain permission from the local jurisdiction. The insight designers have from this long process is not something the contractors can replace. They also are not trained in design or how best to address code requirements or functionality of design decisions. The builder is contracted to construct what is shown on the drawings. Any changes or deviations from the drawings must be discussed with and approved by both the designer and the client before the builder can move forward with the changes.

Some contractors may argue that they can fulfill the role of designer as needed during construction. However, these aren’t contractors we would recommend for your project or who we will work with. The delivery of a high quality project necessitates collaboration. It is vital that the clients, design team, and construction team work together. We each bring different skill sets, expertise, and concerns to the table. It is only have having everyone involved will the project be a great success.

Final Thoughts on Construction Administration for ADUs and Custom Homes

By the time construction begins you have invested hundreds of hours and thousands of dollars in your project. Although it may seem the heavy lifting is behind you and all that hard work will lead to smooth sailing from here on out, this is rarely the case. Construction is complicated and there are always areas of the design that need extra thought as they turn from drawings into a building. We also know from experience that if we all work together we can avoid mistakes, resolve challenges quicker, and deliver a higher quality project. This is why we include basic levels of construction administration in our services when we work on custom residential design or take on custom designed ADUs. We respect the expertise of the contractors, the concerns of the clients, and also our unique talents. It is only by working together can your project be a true success.

Siding going up at the Sheltered Nook House, a custom residence we designed outside of Portland, Oregon.


Other Articles in Our Design Process Series:

  1. Phase I - Predesign

  2. Phase II - Schematic Design

  3. Phase III - Construction Documents

  4. Phase IV - Permitting and Bidding

  5. Phase V - Construction Administration

Design Process: Phase 4 - Permitting

This is everyone’s least favorite phase of getting a new project completed. Permitting is where you submit all of the design documentation to the local building department to be reviewed and approved before being given permission to break ground and start construction. Each jurisdiction (town, city, county, and state), has their own rules and regulations that guide the design and construction process and requirements for issuing permits. Even for small projects like ADUs, permitting requirements can add a lot of work and time onto the project.

Zoning and planning drawings, construction documents, and building permit applications are typically completed by the design professional, and submitted to the necessary offices or departments by the designer, general contractor, or in some cases a special permit expediting company. The design professional will also respond to questions and comments from the city plan checker as they review the drawing sets. It is typical to receive multiple requests for additional information from the various departments, and the design team will work with them to provide necessary additional information or make edits to the drawings to meet their requirements.

With this all being said, here are some of the aspects of the permitting process that is important to consider to have realistic expectations for what to expect:

Permit fees

It isn’t cheap to build a new project and building departments want a piece of the pie. Although fees vary greatly from city to city, you can expect to pay thousands of dollars in permit fees and system development charges. Permit fees on recent ADUs in Portland have ranged from $8,000 to almost $20,000. The fee range depends on size, value, utility connections, end use of the project, and other factors. Some jurisdictions are trying to incentivize ADUs by offering reduced fees but still, there will be a significant cost here. When you are first considering building an ADU, we highly recommend you call the local building department to ask for an estimate of the permit fees.

Department Reviews

Building plans are just one of the many reviews that take place as part of the permitting process. Each department typically has some involvement in the review and approval of building projects. Transportation departments review site plans for curb cuts, water departments want to understand utility connections, plans examiners make sure the design meets the building code, while planners review the site plan and overall design to ensure it addresses the local zoning codes. Depending on the location you may have reviews for tree coverage or removal, and other environmental considerations for the project. The point here is that permitting involves a series of reviews from the various departments in your local jurisdiction. This is one of the reasons permitting processes take months to complete and cost thousands of dollars.

Changing Rules

This comes up below in the note on politics, but we want to give it some extra attention because it is important for everyone to understand the permitting process. City councils, state legislatures, and national codes and regulations are constantly shifting as new laws are passed and repealed. Unfortunately, these don’t follow a set schedule - new rules aren’t introduced all at once and there is no set time period for rules in place to remain set, allowing professionals to learn how to accommodate new regulations. Rules can change month to month and even when the language doesn’t change, departments can decide to interpret rules differently with very little public notice. It is a frustrating but unavoidable part of the permitting process for ADUs as well as custom homes and other project types.

Checksheets

Your town may call this something different like a plan check comment, but what we mean by checksheet is a list of all the revisions, changes, or additional information the plans reviewer requests in order to approve the project. Typically each department will review the design drawings for specific things they require. For example, the water department will review the site plan for water hookups, sizing of the water meter, and calculation of fixtures to assess any fees. Building code reviewers will check to ensure the design meets all of the local codes for safety. Planners will check that the design meets the local zoning regulations. If the reviewers from each department see something in the drawing that doesn’t meet their requirements or there is missing information that they need in order to give the design their stamp of approval, they issue a checksheet. Sometimes a design may only get a checksheet with one or two items, while other times a more complex project or site may lead to dozens of checksheet items. In our experience, typically a project will get a handful of items and can usually receive a permit after one or two rounds of revisions. It is also important to read the note below about politics and subjectivity in permit reviews as this can have a big impact on checksheets and how many items or revisions are needed.

Permitting Time

This is the million dollar question and oh so hard to predict. Not only is prediction almost impossible but it seems to be getting worse and worse over time. With each added regulation, impacts from the pandemic, perpetually understaffed building departments, and unnecessary complications with the codes and regulations, permitting time can range from months to years! In some cases, like smaller more rural towns, getting permit approval my be straightforward and take days or weeks, but these are rare occasions. Working on projects in Portland would typically take 3-4 months to get approved. Cities in the Bay Area could take 6+ months and sometimes much longer. Seattle would require early submission for planning approval followed by a more intense permitting review when the full design documentation is complete. It could take 6-months to a year on these projects. And these are just rough estimates. Timing can fluctuate based on how many other projects are in line ahead of you, what the staffing situation is at the building department, and even what technology the department uses. Some still require paper submissions vs digital reviews. Call your local building department to get a sense of timeline, submission requirements. This is also information your designer should know or can research for you. In fact, we talk to the local building department as part of our pre-design services to gather as much information about permitting requirements and timeline so we can set realistic expectations for our clients and build this into the project schedule.

Expectations

You should definitely expect some changes will be required to your design in order to get permit approval. For many of the reasons discussed above, it is almost impossible to get a project approved on the first try considering the various rules and regulations and the subjectivity of the review process. Despite years of experience designers and architects are still going to have to work with the staff of the local building department to make revisions to the drawings to comply with all of the rules and regulations

A note about politics in the permitting process:

Planning regulations and building codes change constantly. The interpretation of laws within each city varies from city planner to city planner and from inspector to inspector. Some cities make it easier to get planning approval while others implement systems and processes that make some projects impossible, or simply struggle to keep up with the laws that are constantly changing. No one can keep up with all codes and regulations because they can be interpreted by city officials with almost unchecked control. Although residential designers are experts at navigating this complex permitting process, and work hard in order to get your permits efficiently, it is almost impossible to steering a project through without some challenges and hiccups. You can expect that your project will get some questions and plan checks from the planning and code reviewers. Your designer should work as swiftly as possible to make any necessary revisions and answer any questions from the city offices, but it is important to have some patience and understanding as this process is being navigated.

Conclusion

The permitting process varies a great deal from place to place. Yet it is a necessary step in the process and not one that can be avoided or shortcut. When starting your project it is worth calling your local building department to receive an estimate on the timeline and fees associated with getting your project approved and permits issued. Building in a reasonable schedule and cost into your budget and timeline can help ensure your project stays on track and meets your expectations. This is also a great topic to ask your designer about as you start the design process.

Example of Building Permit Application form from the City of Portland. Forms like this typically comprise of a few pages of information that are required for the permit department to start reviewing a project. Each building department has their own form and processes for permitting.


Other Articles in Our Design Process Series:

  1. Phase I - Predesign

  2. Phase II - Schematic Design

  3. Phase III - Construction Documents

  4. Phase IV - Permitting and Bidding

  5. Phase V - Construction Administration

Design Process: Phase 3 - Construction Documents

Once you approve the schematic design work completed in the previous phase, we will begin the construction documents phase of work. This phase includes generating the dimensioned plans and construction details needed to permit the project, describe the design intent for the construction process, and get an accurate bid from the general contractor. This is also when we coordinate our design work with engineering and additional work from other necessary consultants. Basically, this is where we take the design concept, and dive into all of the details and decisions needed to direct the construction of your home or ADU.

Construction Documents

Your design team will take the schematic design and further develop the design including developing dimensioned plans and construction details, coordinate with the structural engineers and other consultants, and work on any details or decisions that could potentially impact the construction cost. This includes the selection of all finishes, fixtures, and equipment (FF&E) - if something is to be attached to the house during the construction phase, we need to accommodate that in the construction documents. We will work with you to make all of the necessary design decisions and material selections necessary to complete the overall design of the project. 

Some of the hundreds of decisions we make during this phase include selecting the doors, windows, flooring, tile, fixtures, appliances, and other finishes. We also draw the interior elevations, cross-sections, key construction details, cabinetry layouts, lighting plans, and other drawings as needed to describe the design intent. Together, we will evaluate and review the construction scope, elements, and details to ensure that the final elements meet the project’s objectives and are aligned with your goals, ideas, and aesthetic taste.  

Each construction document set includes the drawings necessary to describe the specifics of your projects. Typical sets may include drawings such as a site plan, demolition plans, floor plans, roof plan, multiple cross-sections, wall sections, structural engineering drawings and calculations, interior and exterior elevations, construction details, as well as door, window, and finish schedules, as required. Some projects may require additional drawings or fewer drawings depending on the specifics and complexity of the project.

Although we will execute this phase with care, there are often aspects of the design that need to be updated later, during the permitting and construction administration phases of work. This is a standard procedure as part of the design, permitting, and construction process. No construction document set is ever perfect and often drawings or details need to be adjusted based on site conditions, permit review by the local building department, or codes and regulations that may change during the duration of the process.

Engineering and Other Consultant Reports 

During the design process we will determine what additional expertise or reports are required to both guide the construction process as well as get approval from the local building department. Reports and consultant work may include but are not limited to: arborist reports, hazardous materials report, wetland and riparian resource study, geotechnical report, structural engineering, energy efficiency analysis, light and shadow studies, noise study, property survey, other engineering and special inspections, and other similar reports, surveys, and/or studies. We will let you know what additional studies, reports, or consultant work will be required to complete your project as we work through the predesign, schematic design and construction documents phases.

An engineering firm or firms will be enlisted to complete any structural and/or other engineering that is required. We will get cost estimates or bids from each consultant and communicate those costs with you when applicable. All work by consultants become part of the construction documents set and the General Contractor must abide by all drawings, calculations, reports, and studies as they construct the project.

This is a drawing sheet from one of our ADU Construction Document sets, which includes a floor plan, roof plan, and reflected ceiling plan along with notes and legends to help clarify the drawings for the general contractor and their team.

This is a drawing sheet from one of our ADU Construction Document sets, which includes a floor plan, roof plan, and reflected ceiling plan along with notes and legends to help clarify the drawings for the general contractor and their team.


Other Articles in Our Design Process Series:

  1. Phase I - Predesign

  2. Phase II - Schematic Design

  3. Phase III - Construction Documents

  4. Phase IV - Permitting and Bidding

  5. Phase V - Construction Administration

Design Process: Phase 2 - Schematic Design

The Schematic Design phase of our design process is similar whether we are working on a small ADU or a large custom home. This is when we guide you through the development of the look and feel of your project. Design can be a lot of fun and the Schematic Design phase is a dynamic, collaborative process between our design team and you, the clients. Typically, we develop up to three conceptual designs to discuss various options to meet your goals and ideas. These conceptual options will include a site plan, floor plans, elevations, building sections, sketches, and the layout of the interior rooms such as bathrooms, bedrooms, kitchen, and living areas, to describe how the custom home or ADU would look and how you would use the spaces.

Presentations and graphics

In order to describe the design intent we use a range of architectural drawings and graphics to visualize various aspects of the project. You may be familiar with floor plans, but we use other drawings as well, in order to help us describe our ideas and demonstrate how the project will work and what it will look like. This includes hand sketches, computer generated perspective drawings, plans, sections, and elevations. We also often use precedent images to help you better visualize what the end result could look like. In some cases clients even ask us to build physical models to visualize what the building will look like in three dimensions.

Design is a dialogue

We share our drawings and graphics with you and also hold a series of meetings throughout the schematic design process to present what we came up with and describe how it addresses your needs and responds to your aesthetic preferences and project goals. These meetings typically start out with us presenting the work we developed, but ultimately they are collaborative work sessions, where together we edit and refine the design ideas with your feedback and input. These early discussions help us refine the design until it arrives at a design that you love.

One of the questions we often get asked by prospective clients is how they can know they will like the design we create without seeing it before they hire us. It is this design dialogue that makes us confident that each of our clients will like the design of their project. We don’t work in a vacuum and we don’t impose our design ideas on our clients. Design is an iterative process that takes your goals and ideas and couples that with our expertise and guidance to guide the project to the ideal design for the specifics of your needs. The Schematic Design phases is where we work together to craft a beautiful and functional home.

Revisions and adjustments

Once the preferred option is developed in our design meetings, the design team will refine the design to address your ideas and feedback. We make adjustments to the floor plans and location on the site, and start adding details for room layouts and ideas for materials. During the revision process we give you additional opportunities to talk through the function of each space, how the flow works from room to room, and how the project relates to the existing conditions of your property. We also discuss the big ideas for materiality, views, systems, and other elements of the building that could impact the details and cost. 

With the feedback and information from these revisions and adjustment conversations the design team will do one final round of revisions to dial in the design to the final option that will be the bases for the next phases of the project.

Additional work during this phase

Above we described the process that we guide our clients through on the design side. However, there is other work that needs to be carried out during this phase by other experts and consultants. Here are some of the things to expect.

Surveys

A survey by a licensed surveyor is required for all new construction projects. We will help identify a licensed surveyor in your area and you will contract directly with them to create a detailed topographic site survey. Often this work starts during the predesign phase but needs to be complete before we dial in the final schematic design option.

Budget Development

When the final schematic design option is decided upon it is a good time to get a rough estimate for the cost of construction. We recommend that the client engages a general contractor at this phase of the project who can create a construction estimate and collaborate with us during the following phases to further develop the design and meet the stated budget. We can help you select a contractor for this estimate work.

Perspective sketch for a sustainable custom home outside of Portland, Oregon.

Perspective sketch for a sustainable custom home outside of Portland, Oregon.


Design Process: Phase I - Predesign

Whether you are looking for a full custom home for your family, a major addition or remodel to give your existing home new life, or you want to add a new Accessory Dwelling Unit (ADU) to your property, each project begins with research to determine what is allowed and build a familiarity with the existing conditions.

Pre-Design is the first step we undertake for each project. We work closely with you and your family to establish the goals of the project, understand the various codes and regulations, research the challenges and opportunities, and document the existing conditions. This background research creates the framework for all future design work.

Specific tasks that we undertake during PreDesign includes site analysis, zoning research, project budgeting, programming, we discuss the timeline, and assemble the project team. The more information gathered during the predesign phase, the more accurate all future work can be. It is vital to dedicate the time and resources needed to thoroughly research all the various forces that affect a project as it can help avoid costly mistakes or changes further along in the design and construction process.

Site Analysis

The main goal during this phase is to gather information. During the Pre-Design phase, we will research and document your property to understand the context in which we will be designing. This starts with us measuring existing conditions, locating any features on the site that could affect the design, and documenting the property with photos for future reference. We also ask that clients engage a licensed surveyor to survey the property during this stage.

Along with analyzing the site we also research what the zoning allows for your property and any other codes and regulations that will affect the design. Sometimes things like Homeowner Associations, or district overlays can add complications to the base zoning allowed by the city, town, county, or state. We aim to identify all the various regulations that will affect the project during this research.

Programming

Next in the research phase is understanding your goals for the project, your ideas, your aesthetic values and style, and defining what a successful project looks like from your perspective. To accomplish this we meet with you to discuss what you value in a home, identify all of the spaces you require, what functionality is important, and define styles that inspire you. We have specific questions we go over and also create spreadsheets to document the specific metrics to consider while designing - things like square footage, specific rooms you want, sizes, budget considerations, and other elements of the project we need to consider when beginning the design process. This provides a foundation on which we build our architectural design ideas.

Budget

Although it is still very early in the overall timeline of design and construction, it is important to define the target budget for the project. Typically we start these conversations much earlier, as part of our proposal process, but we revisit this conversation here to verify what you are looking to invest in the project. I’d like to emphasize how important it is for clients to have an open and honest conversation about what they can afford to invest in the project. If we don’t know what you want to spend we can’t make design decisions and offer advice to meet your expectations. The more accurate of a budget we can develop, the more we can guide you through the hundreds of decisions needed along the way. It will also give us a framework to work within while we discover the ideal design solution for your needs.

Timeline

As with the budget, we give a rough overview of the project schedule during the early discussions with each new client and within our proposal. However, once we begin the work and start learning about all the various aspects of your project through our research, we can better understand how long the project may take. We thus create a more accurate project schedule at this point and identify key dates, milestones, and meetings. Once the key meeting dates are defined we build a Gantt chart schedule to outline the scope of work. We also send out calendar events for those meetings so they are on everyone’s calendar and we can keep the project on schedule.

As for this phase itself, we typically suggest budgeting 1-2 months for Predesign, depending on the type of project. Detached ADUs maybe be on the shorter end of this range, while major remodels or full custom homes can take 2 months or even longer to gather all the required information to move forward into the design phases.

Project Team

There are a range of professions that need to come together to deliver a great project. Predesign is the time to start identifying the various consultants that will work with us to define the project and craft a beautiful design. This includes professionals that will assist with the research in this phase, like surveyors, geotechnical engineers, arborists, and sometimes civil engineers. We also begin to identify and contract with the professionals we will work with later on in the design process. Knowing that people are busy we want to get your project on their schedule to enable us to keep the project on schedule. Typically we identify a structural engineer, landscape designer, and other consultants that may be needed depending on the scope of work.

We also recommend identifying and interviewing General Contractors this early in the process. Having a great GC as part of the team early on, allows us to get feedback as we embark on the design process regarding cost, constructibility, and other information that could affect the design and budget.

Conclusion

Although Predesign isn’t what people think of when they hire a designer or architect for their custom home or ADU project, it is a vital part of the design process. Investing time and effort in this initial phase can save headaches and money later on in the process. It is important to be thorough and truly understand all the variables that will affect the design work to come.

To learn more about our design process or to kickstart your project please get in touch. We would love to learn about your project’s goals and ideas and help you craft a beautiful design.


Step-by-step guide to building a custom home

Creating a custom home for your family is a wonderful opportunity to design something unique and tailored to your lifestyle. It is also a long process that takes a lot of time and expertise to get right.

We have worked with many clients who come to us at different points in the process and we create an outline of the steps needed to complete their project. To help shine some light on the full range of steps you may have to go through we’ve compiled this list.

Custom Home Step-By-Step Process:

  1. Set a budget range
    You will need about 25% of the full budget in cash and you can finance the rest through a construction loan and convert it to a typical mortgage upon completion of the project.

  2. Find a region you want to build in
    Identifying a rough area where you want to live is an important first step. It allows you to narrow the list of potential properties to purchase. Plus knowing the area can allow you to build relationships that can help later on in the process, like knowing local real estate agents, researching contractors, contacting the local building department, and more.

  3. Do code, zoning, and tax research
    It is vital to understand what is allowed to be built in the area you are looking. This could affect what town/county/state you want to pick for your custom home. For instance, some areas may have size or style restrictions for homes, or minimum lot sizes. Some may allow ADUs or guest houses while others prohibit additional structures. Certain jurisdictions will have higher property taxes or other fees that could push the project beyond your budget. These are just a few of the many considerations that you need to research for the areas you want to live. This is something a designer can help with.

  4. Get control of land
    Once you identify the region you want to live, you start looking for the perfect property for your needs. Once you find some land that will work, you either purchase it outright (typically with cash), or have a signed contract or Letter of Intent with a set evaluation period, typically 90+ days. This 90 day evaluation period gives you the right to walk away if initial research determines that you won’t be able to build what you want. Often you have to put some earnest money down to get the seller to agree to this evaluation period. It could be refundable or non-refundable so try to negotiate the best terms.

  5. Pull together the equity
    Typically you will need 25-35% of the full project cost in cash or equity for a bank to loan you difference. You can also leverage things like the value of the land as part of your equity contribution if you own it outright. For example, if the full project will be $2,000,000 for the land purchase, design fees, and construction costs you will need approximately $500,000 to $700,000 in cash or equity, and get a construction loan for the difference. If you own the land outright, and the property is valued at $300,000, than you probably will only need to bring $200,000 to $400,000 in cash while a construction loan will cover the remaining $1.5 to $1.3 million.

  6. Hire the design team
    You could hire the designer earlier to help with code/zoning research on potential properties. Investing earlier can save money in the long run if it can avoid properties that have challenging codes/regulations or difficult constructability issues. You should budget about 10-15% of the overall project cost for design services. Of the $2million budget mentioned above, you could assume $200,000 to $300,000 would cover the design, engineering, and other consultants needed to complete the design work.

  7. Get financing in place
    This can overlap with the design process, and in fact, most construction loans will want to see the design plans so they can do an estimated value of the finished project to help determine the amount they will lend. On previous custom home projects we have worked through the Schematic Design phase with our clients and they used that work to help obtain the construction loan.

  8. Design Process
    We recommend scheduling approximately 8-12 months for the design process from hiring the design team through submitting the design work for permit approval. However, this range depends on client decision making, complexity of the site, size of project, local permitting requirements, etc.

  9. Permitting
    Every project will need to be reviewed and approved by the local building department. Considering that each jurisdiction will have their own rules, regulations, and permitting process, this schedule is highly variable and hard to predict. In Portland, Oregon we experienced permitting for a custom home taking 4-5 months. In the Bay Area permitting for a custom home could be 6-months to a year and sometimes even longer. Smaller towns and rural areas tend to be a bit easier to work with and permitting can take less time than in large cities.

  10. Construction
    Once the permits are approved you can break ground on the construction of your custom home. We estimate that it can take about 1-year to build a high-quality custom home. This could be more or less depending on the site, final design, financing, weather, labor and material availability, and other factors. Most construction loans will want the build to be completed within 12 months of issuing the loan so this is important to know when building the construction schedule with your design team and the general contractor.

  11. Certificate of Occupancy
    This is one of the last steps in the construction process and includes the building inspector reviewing the built project and determining it is a safe and meets all codes and regulations. Typically this signifies the completion of the construction phase and the point in which you can move into your new home.

Additional Thoughts for a custom home:

  • Budgeting
    Many people calculate budgets on a cost per square foot basis. I really don't like or advise this. Cost per square foot can vary so much depending on decisions throughout the design process. One example: wood flooring can be $5/sf or $25/sf depending on the material you chose. Same for tile, cabinets, appliances, windows, etc. Decide what you are comfortable spending as a total sum and together we can design a project and make decisions in order to meet that number.

    • To get something you love, that is beautiful, sustainable, high performance, and high quality, you are probably looking at $1,000,000 in construction cost or more. We can design something for less, but my experience is that at the end of the day, almost all clients want something that pushes a custom home budget to over $1,000,000. That is really the floor for custom home budgets.

    • There are also lots of aspects of building that people don't consider at the beginning of the budgeting process (especially when they look at cost per square foot numbers online). For instance, does it need a septic system? A well? A long driveway/road access? Lots of excavation, site clearing, or grading? Utilities? A pool? A fancy Tennis Court? Unique landscape design? These sorts of infrastructure needs and additional features can easily add $100,000 to $500,000 or more in costs before you even start building the actual house.

  • Less. But Better.
    My belief is that quality trumps size every day of the week. Often people come to me with certain size requirements - for instance “I need a 3,000sf house” or “We require a 300sf en-suite bedroom,” but don't understand that a well designed 2000sf house or thinking about the quality of their bedroom space rather than size could actually be better for them where being more efficient in space usage can give them what they want in a smaller package. This then allows us to invest in better quality materials and systems. The point here is that we should talk about what you need in terms of rooms, function, quality, and values rather than focus purely on size. You should want a great house, not necessarily a big one.

  • Investment
    Find a property that allows you to build more than one structure. Having a main house plus a guest house/ADU/Pool House etc. would be ideal for multiple families sharing a property. Plus if you ever want to rent out the additional unit to help pay for the mortgage this would give you the best return on your investment. Or perhaps you will want to downsize when your kids leave for college and the ADU could be a perfect place to age-in-place while your rent out the larger home. Or maybe an aging family member will need a place to live in the future and the guest suite would be a great place for them to live rather than moving to a retirement home. The point here is to consider all of the potential future needs as you consider what property to buy and as we work through the design process. Even if you don’t want to build other things now, having the opportunity to add on to the project in the future could be of tremendous value.

Other Resources About Custom Homes:

If you have any further questions or would like to discuss your goals and ideas for a custom home project, please don’t hesitate to reach out.

The Sheltered Nook House, a 2,200 square foot sustainable custom home outside of Portland, Oregon.

The Sheltered Nook House, a 2,200 square foot sustainable custom home outside of Portland, Oregon.

Design Your Dream Home: Interview With Lucas Gray

Doug and Steve chat with Lucas Gray in this episode of Design Your Dream Home!

Lucas brings passion for design excellence and years of international work experience designing projects in Asia, Europe, Africa, Australia and North America. His innovative, competition winning design ideas blend sustainable building strategies and timeless architectural forms with a particular focus on materiality. He brings expertise working with diverse communities throughout the world, offering his services to community groups and nonprofits to create positive change through architecture.

Lucas' residential work focuses on sustainable modern custom homes, accessory dwelling units (ADUs), vacation houses, cabins, cottage clusters, infill developments, and missing middle housing.

ADU Cost: What Can We Learn From Portland?

We look at ADU Costs in Portland and around the country with designer Lucas Gray, who has been designing custom ADUs for several years. Portland is a very mature market, so it's nice to look up there to see what we can learn about the costs of building an Accessory Dwelling Unit (ADU). Lucas Gray, from Modern ADU Plans, came on the show to talk shop and goes into the costs of ADUs, what homeowners can do to budget and control their ADU cost, and more.

If you are thinking of adding an ADU but are curious what sort of investment you will need to make, watch this interview to learn more about how much Accessory Dwelling Units cost and other tips on the design and construction process. It is important to compare the investment you make in creating an ADU with the return you will get through rental income, property value increases, and other benefits. ADUs aren’t cheap, but they are a great investment when you weight the costs and returns.

It is also important to consider that costs can cary greatly from place to place. California ADUs may cost a lot more than Portland ADUs or Texas ADUs, but with higher rental prices these projects often make sense in any location that they are allowed.

ADU Requirements Around the Greater Portland Metro Region

Although we started working on ADUs by doing custom designs for our clients, we are now selling ADU plans much further afield from our Portland roots. Unfortunately, there aren’t any standard ADU regulations that permeate across the country. Instead, each town, city, county, and state has their own rules and regulations. Starting in the greater Portland Metro region we will start adding links and resources for various requirements for ADU projects.

Although there are many similarities with requirements for Accessory Dwelling Units in areas outside of Portland, Oregon (or even the states of Washington and California) there are aspects of the general requirements that we also see vary by town or county jurisdiction.  What we've noticed that can change across jurisdictions are:

  • the size of ADU's (ex. maximum sizes can range from 400-1200sf and codes are often changed over time)

  • height limitations (we’ve seen rules that dictate ADU heights from 10’ to 20’ and in some places there may not be a height limit at all)

  • the types of ADU's allowed (ex. Detached, Attached, Basement, Garage, junior, or others)

  • the number of bedrooms (ex. a limit of 1, 2, 3, or no limit)

  • are ADUs even allowed (unfortunately many jurisdictions still don’t allow them and within jurisdictions, some neighborhoods or HOAs limit ADUs further.)

  • Style (some places have rules on what an ADU can look like.)

The common theme is that town planning departments and communities generally accept Accessory Dwelling Units, although they aim to "maintain the character" of the neighborhood, and this sets the setback(s) and/or limits the height so that the primary residence remains the dominant element present to the street.

In order to help clarify all of these differences, we have listed some resources below for the towns and cities around the Portland region. While we're only covering a few of the towns outside Portland to the south and west, we hope to add more to this list over time, so if you would like us to look into and add your town to this list, please get in touch!

Accessory Dwelling Unit or ADU Requirements, by town:

Clackamas County ADU Requirements

Clackamas Maps

Clackamas County Zoning Map (PDF)

Clackamas County Zoning Code Table 315-1: What Zones are ADUs allowed in

Gladstone R-5 ADU Requirements

Gladstone R-7.2 ADU Requirements

Milwaukie ADU - Attached

Milwaukie ADU - Detached

Oregon City ADU Requirements

Tigard ADU Requirements

Portland ADU Requirements

Portland ADU Zoning Code

Vancouver, WA ADU Requirements

Healthy Indoor Environments for ADUs and Custom Homes

There is so much more to developing a design for an ADU or Custom Home than just making a beautiful building. Our approach balances aesthetics, sustainability, high performance, and maybe most importantly, healthy indoor environments.

Great design creates healthy environments.

According to the EPA, “Americans, on average, spend approximately 90 percent of their time indoors, where the concentrations of some pollutants are often 2 to 5 times higher than typical outdoor concentrations.” Armed with this data, we look for ways to make our buildings healthy places to live to avoid polluted environments that can negatively impact your health. The most beautifully designed home is a not a success if it isn’t also sustainable and a healthy place to live. A great home needs to do all of the above.

Indoor Air Quality

Indoor air quality is one of the many considerations that guide decisions during our design process for both custom homes and custom designed ADU projects. From creating spaces that have natural ventilation and can open up to the outdoors, to selecting materials that minimize toxins and off-gassing, we help guide our clients through the decision making process that leads to a healthy home. This includes selecting natural materials (like plaster instead of gypsum board), low VOC (volatile organic compounds) paints and adhesives, and heating and cooling systems that filter out contributors to indoor air pollution. A home shouldn’t contribute to conditions such as asthma, allergens, or other irritants, and the design process can help avoid these conditions.

Open to the outdoors

Before we look to mechanical systems like air filters on an HVAC system, we look for opportunities to create passive ventilation in our homes. This includes operable windows in the areas people spend most of their time - bedrooms, living rooms, kitchen and dining areas - and other ways to make use of natural ventilation for airflow, like natural convection to create airflow. The orientation of the building, sun shading, and other passive strategies can also limit the use of active systems that can move dust and toxins throughout a home’s interior.

A common design element we use in a lot of our projects are large sliding doors that completely open up spaces to the surrounding landscape. Living in connection to nature can help make our indoor spaces healthier and more enjoyable - bringing in fresh air, natural light, as well as views into the beauty of nature.

Don’t compromise on health

When creating a home for a family we don’t believe in compromising between a high performance healthy home and great design. A healthy indoor environment is part of our thinking from the start of each design. It as integral to our process as developing efficient floor plans, beautiful aesthetics, selecting high quality materials, and integrating sustainable strategies. It is only when all of these things come together that a project meets the needs of our clients and becomes a great place to live. By adding an ADU you are taking a great first step into building a sustainable home.

A custom home in an urban area wraps around a central courtyard so all rooms have access to natural light, natural ventilation, and have views to the outdoors. Natural materials, low VOC paints and adhesives, and high quality air filters on the HVAC system round out the strategy to create a healthy indoor environment.

A custom home in an urban area wraps around a central courtyard so all rooms have access to natural light, natural ventilation, and have views to the outdoors. Natural materials, low VOC paints and adhesives, and high quality air filters on the HVAC system round out the strategy to create a healthy indoor environment.

Passive House for Custom Homes

Every project we work on strives to be as sustainable as possible within the parameters we are given. This means we are continually looking for opportunities to specify sustainable materials, lower energy and water usage, and reduce waste. We consider things like lifecycle costs and carbon emissions as we make decision decisions and guide our clients through the design process.

With sustainability as one of our core values, clients often ask us about certifications such as LEED, Earth Advantage, Living Building, or Passive House. In this post we will discuss Passive House and whether it is right for your custom home project.

Passive House standards are a set of design principles based on building science, that lead to a quantifiable level of energy efficiency. Using passive design strategies and active systems that are tailored to your specific climate and the design of your home, we can create a comfortable place to live while minimizing energy usage. To achieve this, Passive House design and construction follows theses five principles:

  1. Employ continuous insulation throughout the entire envelope without any thermal bridging.

  2. Create an extremely airtight building envelope, preventing infiltration of outside air and loss of conditioned air.

  3. Manage solar gain with high-performance windows and doors (double or even triple-paned windows depending on the climate) in order to take advantage of the sun's energy for heating purposes in the cool fall and winter months and minimize overheating during the warm spring and summer months.

  4. Utilize a balanced heat- and moisture-recovery ventilation (HRV system).

  5. Minimize the space conditioning system.

I have used these design principles to craft projects that have minimal energy usage while being extremely comfortable in all seasons. In fact, a complaint one client had after moving into an ADU we designed, was that the heating system didn’t turn on (meaning the extra insulation we put in the walls prevented the home from ever getting too cold). This is the type of complaint we actually like getting. The house performed too well for the heating system. I believe strongly in using building science to create high performance architecture, and I make design decisions with that in mind.

For those building a single family home, energy consumption and building performance are important aspects to consider when working through the design process. The orientation of the building, the size and placement of overhangs and shading devices, the amount and type of insulation, and the selection of systems all play a central role in how your project will perform over its lifespan. A small upfront investment can pay itself back many times over through comfortable and healthy places to live and lower energy bills.

The other advantage to Passive House strategies and the reduction of energy usage is to plan for a net zero ready home. By using all electric appliances and systems, and investing in insulation to reduce energy usage, we can easily add solar PV arrays that can more than offset your energy usage. Meaning your house could produce all the energy you use and sometimes even more. This not only saves you money every month, but also helps address climate change by reducing your reliance on fossil fuels.

To help encourage people to pursue higher performance building, and to help shift the industry to create the products and systems needed to achieve these goals, certification systems have arisen to verify that the goals have been achieved. The Passive House Institute US manages the certification process and offers a lot of resources to help design professionals meet their standards, and to educate clients on the benefits of this approach. For custom homes I typically don’t recommend actually pursuing certification. Rather than spend the extra money and time working through the certification process I recommend investing in better systems or adding a solar array to your project. However, for some clients having that certification is an important step proving how their home will perform.

Whether certification is pursued or not, our designs strive to meet the performance criteria laid out by PHIUS. We believe it is the right approach to designing better buildings and giving our clients healthier and higher performing homes to live in.

You can learn more about Passive House here: https://www.phius.org/

An Accessory Dwelling Unit under construction. We wrapped the entire structure with 2” of rigid insulation and 3” of rigid insulation on the roof. The continuous insulation has no thermal bridging and creates an tightly sealed envelop preventing loss of conditioned air. Radiant floor heating is the only space conditioning system and rarely turns on. An HRV allows for fresh air to circulate without losing heat energy.

An Accessory Dwelling Unit under construction. We wrapped the entire structure with 2” of rigid insulation and 3” of rigid insulation on the roof. The continuous insulation has no thermal bridging and creates an tightly sealed envelop preventing loss of conditioned air. Radiant floor heating is the only space conditioning system and rarely turns on. An HRV allows for fresh air to circulate without losing heat energy.

Understanding Cost Considerations and Scheduling for a Custom Home.

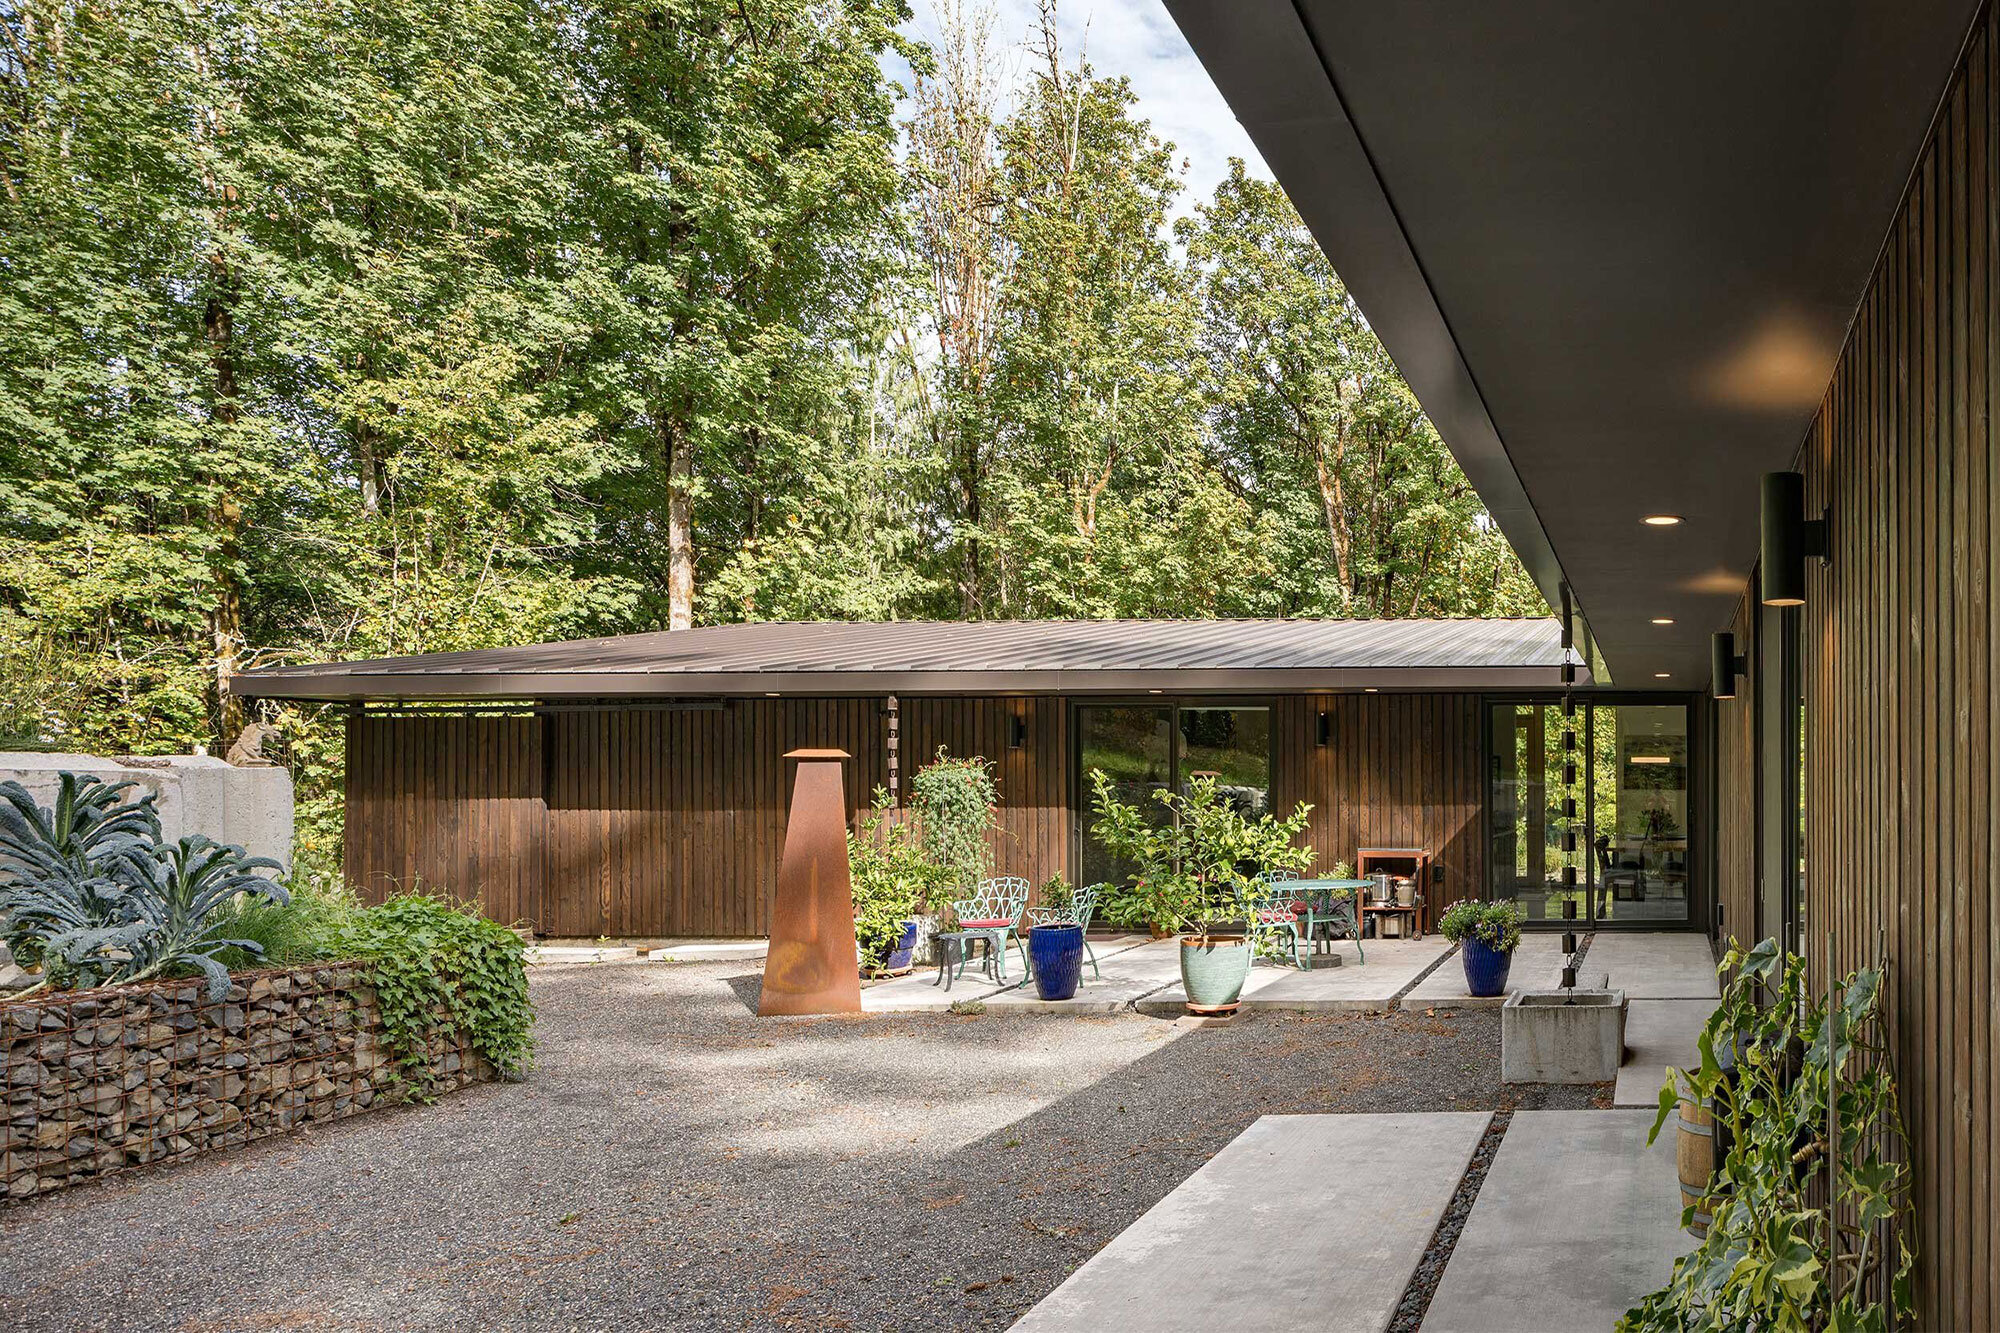
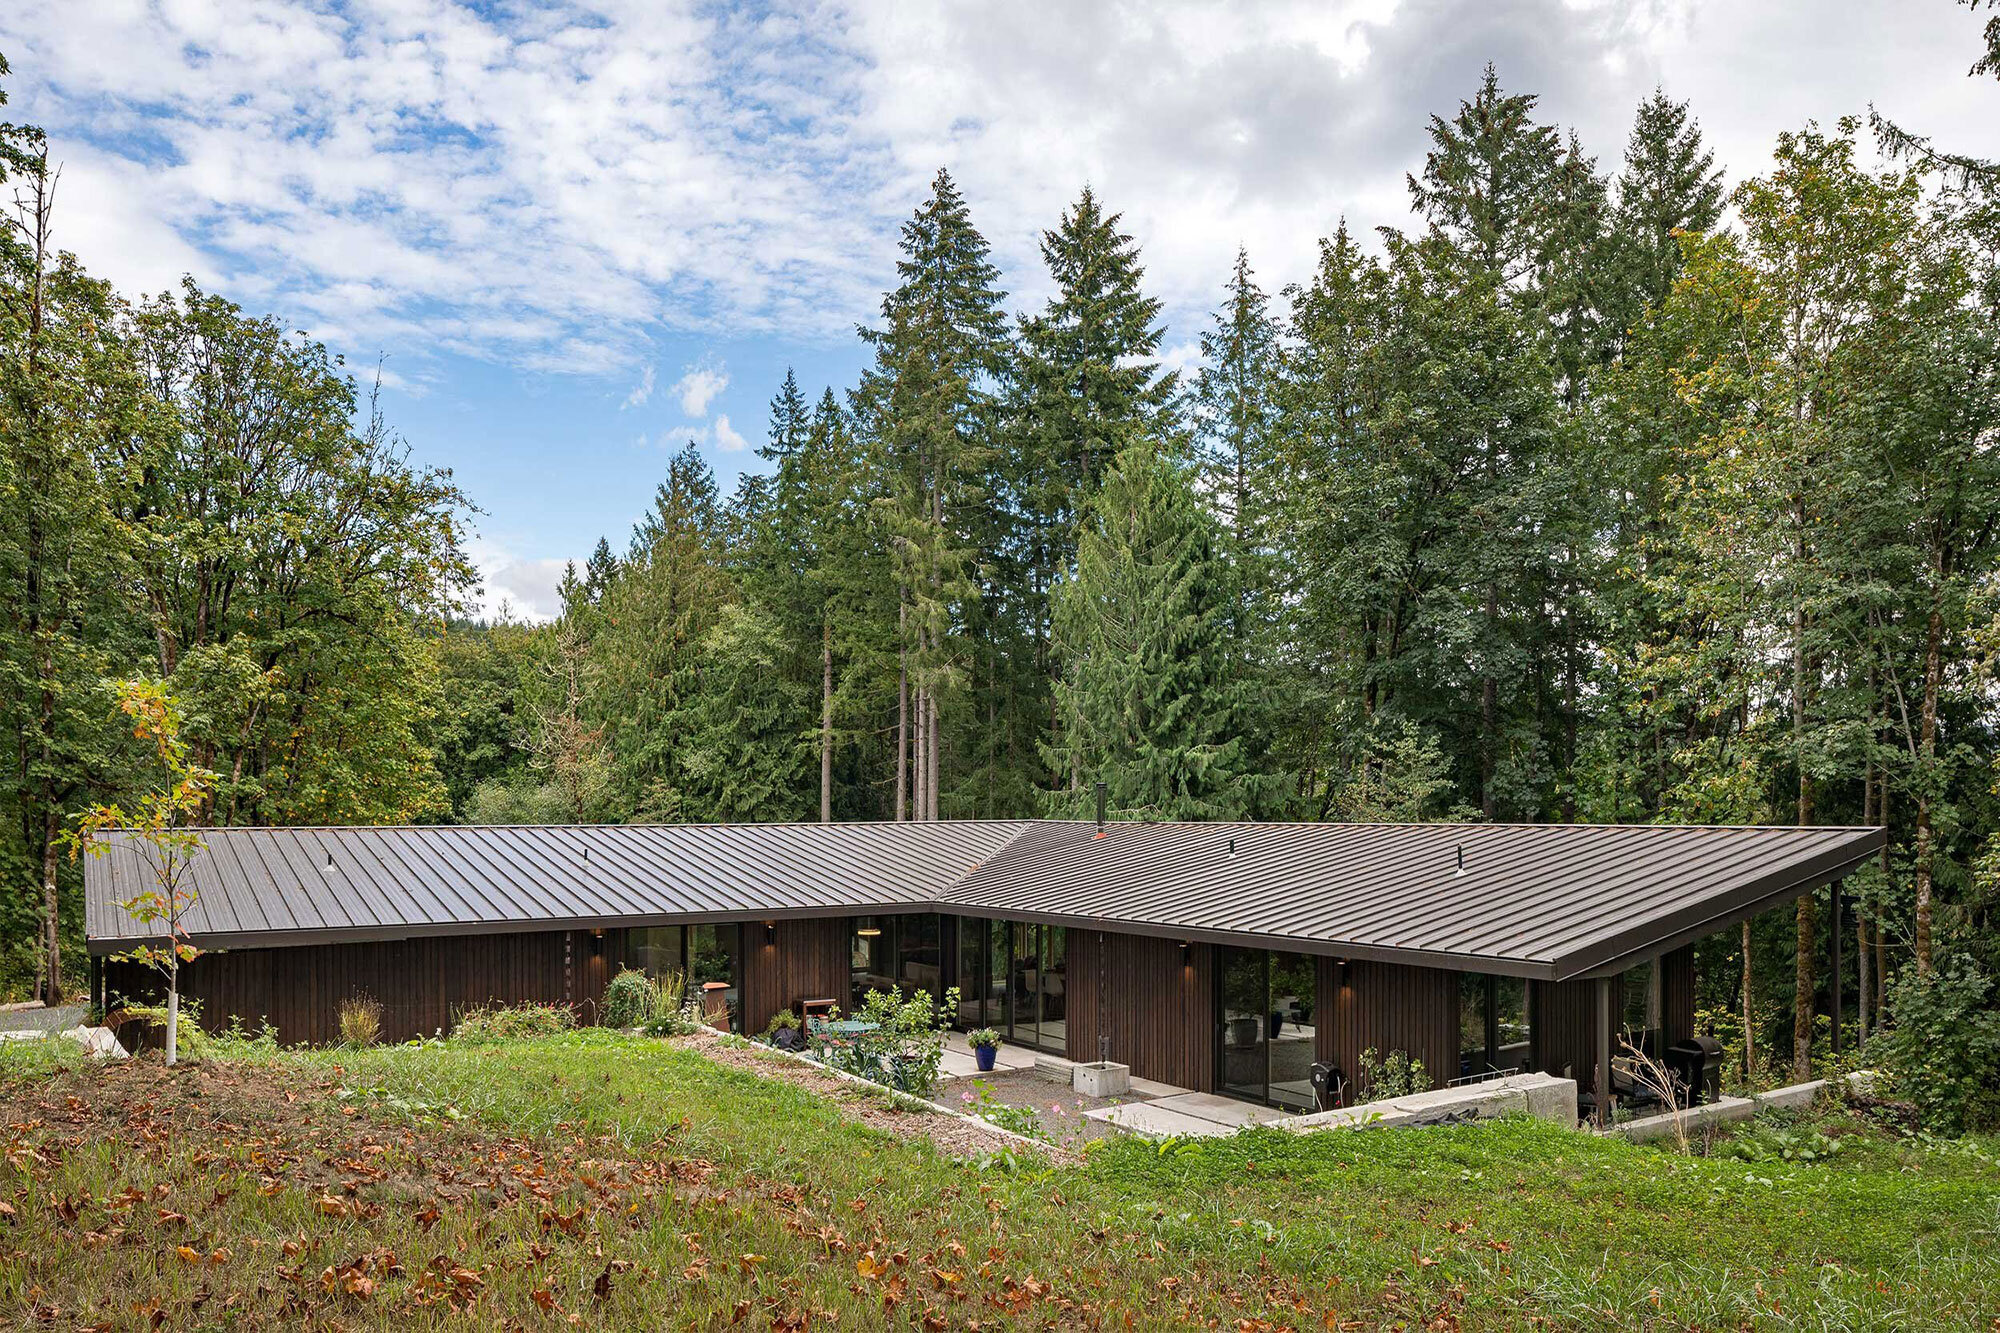
Whether we are working on a high-end sustainable custom home, or a beautiful Accessory Dwelling Unit (ADU) for someone’s backyard, we go through an intensive design process to deliver great results to each client. We take the trust people put in us seriously as we are responsible for their investment and achieving their goals and ideas. It is our job to guide clients along a design process to best manage the project budget, make the necessary decisions along the way, and develop a comprehensive drawing set that gives the builders a clear documentation of the design intent, guiding the construction process.

Designers Add Invaluable Expertise And Leadership To The Design And Construction Process.

Our job is to represent the best interest of our clients and develop designs which reflect their goals, ideas, taste, and lifestyle. This extends to managing budgets, developing a beautiful design, and addressing the project’s program. Only when our work addresses all of these factors is a project truly successful. Our design process is tailored to guide our clients through the decisions needed to deliver a great result.

The designer leads the entire project team, including consultants, engineers, contractors, and the clients, with the aim of achieving the best result possible. Like a symphony conductor, we bring all the stakeholders together and facilitate the collaborative effort needed to move the project forward and best serve the client’s and achieve their goals. This means we advise on decisions like cost implications of design decisions, identifying priorities within the program, incorporating sustainable systems and materials, and balance lifecycle costs against the initial budget.

It is only through a close collaboration between all the stakeholders can we meet or exceed your goals. This extends through the design phases, permitting process, and through construction. We are there to work with the builders, advocate for our client’s best interest, and guide the team to deliver a project that aligns with the design drawings and meets the quality standards we and our clients expect.

Great Design Doesn’t Mean More Expensive.

Developing a more comprehensive set of design drawings, carefully working through the hundreds of decisions that are needed to be made, and having a clear strategy for execution can only happen with thoughtful efforts early on in the process. Working closely with clients and the contractors as early as possible helps us hone in on the goals and scope of the project, identify the priorities, and develop a work plan to deliver high quality results. This allows us to balance the design quality, size and efficiencies, construction plan, and ultimately the cost of the project.

In short, if you want to have a higher quality result and manage the project budget, it is in your interest to pay your designer more. The greater the effort put into the design process, the more detailed the drawings are, the more decisions that are made prior to breaking ground, the less chance there is for costly change orders, and the more potential savings there will be. Investing in the design process is the best way to control your project budget and quality. The value designers will bring to your project often is greater than their fees - both in terms of added value to the end result, but also through problem solving and potential savings during the construction process. Invest in hiring a great designer to lead your project team. It is money well spent.

Cost Per Square Foot Budgeting Is Misleading.

Cost is always a concern for our clients, no matter the size of the project or the size of the budget we are managing. It is important for the three main parties, designers, clients, and contractors, to be on the same page when developing an accurate project budget. We often see architects and designers, clients and builders, use a cost per square foot calculation to identify an appropriate budget and compare costs across projects. Although this may seem like a simple way to get a target number, we find that it is often misleading and doesn’t consider many considerations that affect the final cost of a project.

The square footage of a project is not the only thing that affects the cost. For example, steeply sloped topography or a site that is difficult to access can dramatically impact the cost regardless of size. There can be dramatically different costs of labor between rural, suburban, or urban site locations. Seismic zones, hurricanes, and other climatic considerations can affect structural systems or add other costly considerations to the design. Selection of materials, systems, and fixtures can have a dramatic impact on the cost. Further, cost per square foot calculations don’t take landscape features or other external elements into consideration. Do you want patios and decks? A pool perhaps? Cost of driveways, landscaping, walkways, and other external features would not be captured in a cost per square foot calculation but are all important aspects of a project that must be considered in the budget.

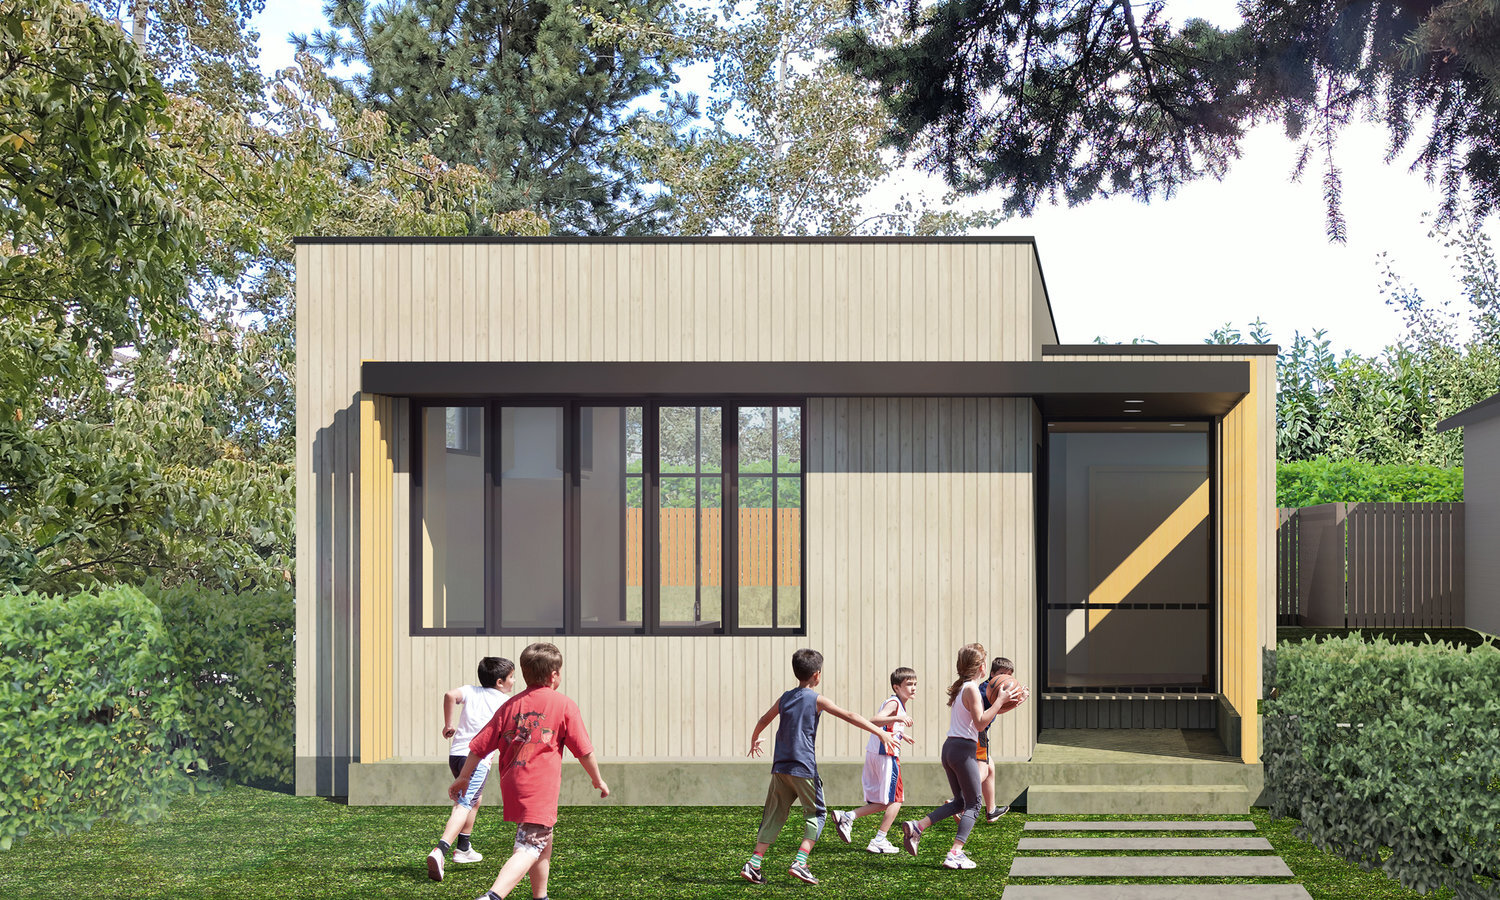
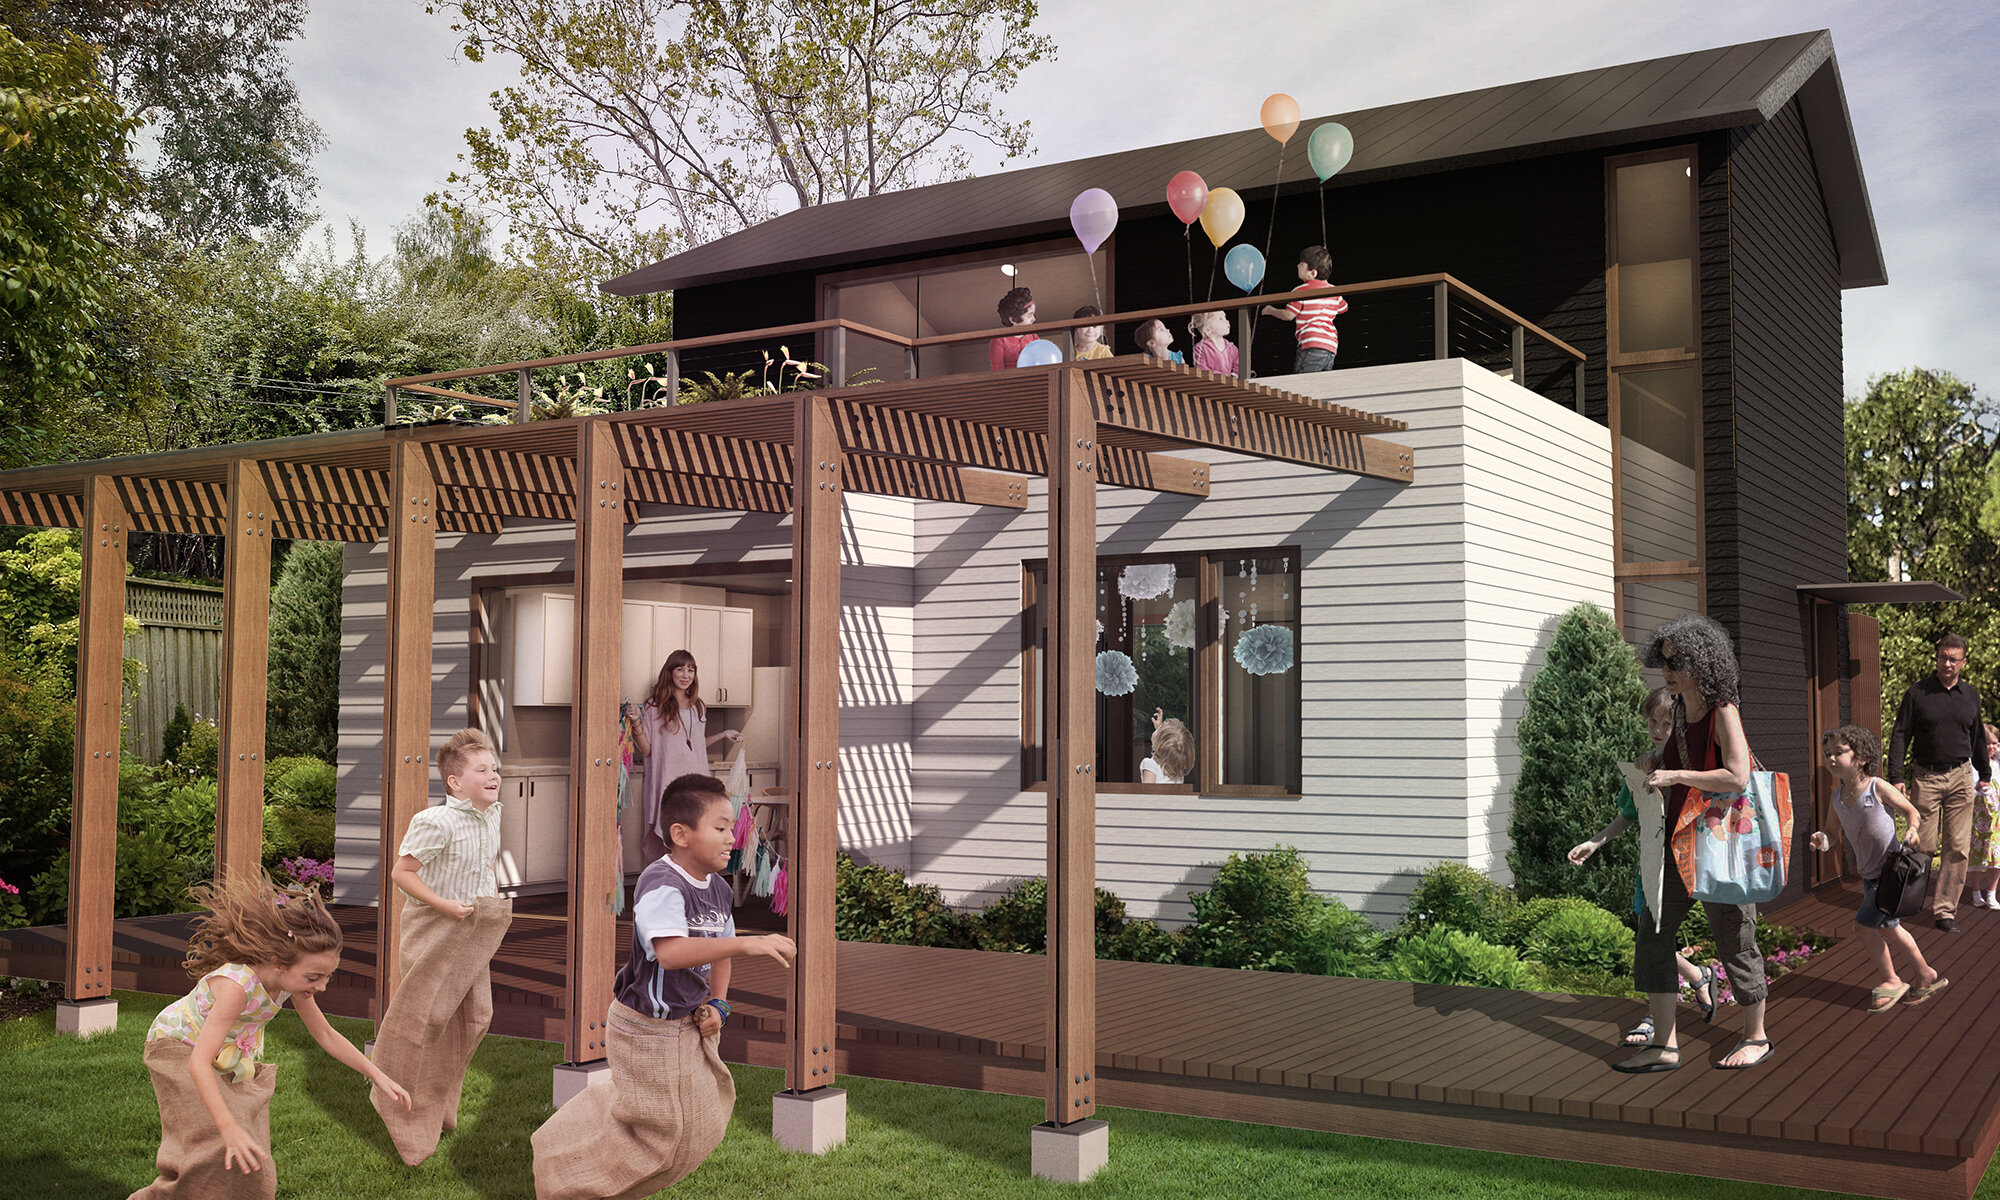
The considerations above are common for larger projects and custom homes. For smaller buildings like ADUs, cost per square foot presents other challenges. There are some base costs of construction that are needed regardless of project size. Getting equipment to the site, mobilizing the construction team, running utilities to the new home, are all required if the project is 800sf or 3,000sf. Expensive parts of a home like kitchens and bathrooms are also not “subsidized” by the less expensive spaces like bedrooms and living rooms. All of this means that when you divide these costs by the smaller square footage, your cost per square foot calculations can go soaring. Where a custom home may start at $350/sf an ADU may be $500/sf or even higher.

Instead of a cost per square foot calculation, we recommend to our clients to be open with us and discuss the total amount they want to invest in the project. Having these open conversations builds trust and allows us to offer advice and guide clients through the design decisions needed to keep a project on budget. Together with our clients we can prioritize what is most important and where to invest the budget to get the best results. For instance, a slightly smaller, more efficient layout could allow you to select higher end finishes and fixtures. Quality over quantity can lead to a better end result while managing the amount invested in the project.

Design and Construction Takes Time But Not Forever

Along with budgets, project schedules are one of the biggest concerns our clients have. This is especially true of residential clients who are building a project for their families to live in. Often they are concerned that building a custom project takes too long and they can save time simply purchasing a home already built. This is understandable and designing and building a unique custom home is definitely investment of money and time, but one that will be well worth it.

It is important to be prepared for the time needed to move through a thorough design process, work through the local permitting requirements, and build the home to high quality standards. Rushing a project isn’t recommended as it will either increase costs, decrease quality, or both. A home that is crafted specifically to meet your goals, lifestyle, and tastes will pay off over the years you will live there and the generations of family that will enjoy the home together.

The more comprehensive the design process is the better the end result. Spending extra time in the design phase will allow for the team to better document the design decisions, detail the project to give the contractor more specific instructions, and will save the headaches and increased cost of making last minute decisions while the project is under construction. Spending the extra time during design will also allow the contractor to better schedule the construction phase, potentially preventing unforeseen delays.

A bit of extra time spent in design can save significant time during the construction phase. Overall, the time invested in the design and construction of your custom home will pay dividends when you get to live in the house that is tailored just for you.

Project Complexity Affects the Schedule

The duration of both the design phases and construction phase of a project is highly variable based on the efficiency of the decision making process and the complexity of the project, both in terms of the site conditions as well as the size and design of the building itself. Site conditions are part of the research we do during our initial pre-design phase, giving us the information we need to know to move forward with the design of the building. The more complex the site - topography, natural features, codes and regulations, overlays like historic districts or environmental conditions, existing structures, etc. - the longer it takes for us to complete our research and design a response to the specific conditions.

The other big variable is the time it takes clients to make decisions. When we present design concepts, discuss relevant information, and offer options for clients to consider, we understand it takes some time to review, process, and decide which options are the best for your needs. Some clients make these decisions quickly while others require longer to deliberate and decide the path to proceed upon. The more complex the project the more decisions need to be made and the greater this can affect the project schedule.

To give a rough understanding of a typical project schedule, we find that the design phases of the project can last anywhere from 6-9 months, and sometimes longer if it is a particularly challenging site or the clients need additional time. Then there is the permitting phase which can be anywhere from a few months to almost a year depending on the local requirements and process (we find that most building departments are very slow in reviewing and permitting projects these days). Once the permit is issued you can estimate about a year for construction to be completed, sometimes less, sometimes more.

Design and Construction Is Like A Symphony

Like a great piece of music, it takes a collaborative effort for all the instruments to play their part of the overall composition. To make it work, a conductor is needed to guide each player and coordinate the whole ensemble. This is the role the designer plays in your project. The designer assembles the team of consultants (which could include surveyors, structural engineers, civil engineers, geotechnical engineers, MEP Engineers, Landscape designers, lighting and acoustic consultants and other specialists), guides the client through the decisions needed along the way, and helps select and collaborate with the builder during construction. Like the symphony conductor we balance the needs of each discipline and coordinate the communication and flow of information across the team. We develop the project schedule, set key milestones, and keep the client informed of progress. We review all the work that comes in and coordinates the design of the home to respond to each consultant’s work. It is a complex job that necessitates dedications, commitment, detail oriented work, and knowledge of all the fields that contribute to the success of the whole.

This is why it is important for your designer to be involved in all aspects of the project. From the beginning we guide the research to gather the necessary information, work with the clients to hire the required consultants, and guide you through the selection of the right contractor. We follow the project from this initial pre-design work through the design phase, permitting process, as well as through construction to guide the project to completion. We are advocates for our clients along the way and help you make the best decisions for the success of the project.

It is only by having a great team, working together, that a project can be a true success. Clients, Designers, Consultants, and Contractors form a team with the same goal, delivering a design that meets the client’s goals, budget, and program, while creating a beautiful design that is inspiring.

Conclusion

Every project regardless of size is a complex undertaking. It is our job to make the process as smooth and stress free as possible. This starts by educating our clients and setting clear and transparent expectations for what to expect. Design is really a series of decisions from creating the layout and floor plans, to developing the look and feel of a new home, to diving into the details of how it will get built. It is our job to be your advocate along the way, both guiding you to make the best decisions possible, but also acting in your best interest to keep the project on budget and on schedule.

It is only by working as a team can we overcome the challenges along the way and deliver a great project that meets your goals and ideas and becomes a beautiful inspiring place to live for your family. We take this responsibility seriously, and although we have a lot of fun working with our clients throughout the design and construction process, we still understand the immense trust you have put in us and our responsibility to deliver great service.

unsplash-image-5aiRb5f464A.jpg
20170503115648812.png
plan.jpg
sheltered nook house construction siding
Sheltered-Nook-Custom-Home-Exterior-Josh-Patee-03.jpg

ADU Design Considerations

Small in size doesn’t equate to easy design work. ADUs require a lot of thought and careful design considerations to arrive at the best solution for your needs. Here I will point out some important considerations that we address through our ADU design process. Specifically, I am highlighting some aspects of ADU design that may not be obvious when first thinking about adding an ADU to your property.

Size of the ADU

Although maximum size of ADUs is often restricted by local codes, there are lots of considerations that affect how large you want your project to be. Of course the project budget will affect the overall size of the ADU but other things like size of your backyard, use of the project, number of bedrooms you are looking for, even the topography of the site could affect the final size.

Beyond the total square footage of the project, there is also the decision of the size of the footprint of the new ADU. As an example, if you wanted an 800sf ADU, should it be all on one level for an 800sf footprint, or should it be a two-story project with a 400sf footprint and 400sf second floor? These decisions can affect the cost of the project and also have a profound impact on your property. Smaller lots might dictate a smaller building footprint and 2-story structure in order to preserve some outdoor space. While larger properties may lead to a single-level ADU with a larger footprint, but no stairs and less height.

Less is More

In this case I mean it literally. The less things you put into an ADU the more space you will have for living. One bathroom instead of two gives you extra space in the kitchen, a dining nook, or larger living room. Less space in the bedroom gives you more space where you spend most of your time.

ADUs are small homes and it is important to consider what spaces are the most important and where the users living in the ADU will spend most of their time. We find that larger kitchens and spacious living rooms are the best place to invest in extra space, while bedrooms and bathrooms should be designed to be efficient but compact.

Outdoor Connections

With limited space to work with within an ADU we look for strategies to make the smaller dwellings feel more spacious. We use borrowed views, strategically placed windows and doors, and outdoor rooms to make our ADUs feel more spacious. When living rooms open up to patios or covered decks we create bonus space for living that isn’t counted against the square footage limits. Plus, connecting to the outdoors physically and visually makes for a better interior with more natural light, fresh air, and views of nature.

Landscape Design and ADU Location

Beyond the outdoor connections, we also consider how the ADU responds to the surrounding landscape and overall design of the property. How will people access the ADU from the street? What is the circulation patterns on the property? Where should the front door be located? Where should the living room or bedrooms be located? Can they open up to the outdoors? How can we preserve private outdoors space for both the main house and the new ADU? How can privacy be preserved between the units?

It is important to consider how the landscape will be used and how the ADU design and location can compliment the rest of the property. Buildings are never isolated objects but rather are integrated parts of a larger landscape. It is important to consider all the impacts the ADU will have from the beginning of the design process.

Design Style for the ADU

We start the design process by having conversations with our clients about aesthetics, style, and materiality. We want to understand our client’s taste and design values so we can create an ADU design that closely aligns with their taste. We want to make sure our clients are happy with the outcome and to accomplish this goal we need to get to know our clients and what they like and don’t like from the early phases of the design process.

These conversations start with sharing precedent studies, asking our clients to do some homework by collecting images of spaces or projects that they like as well as those that they don’t like. We also discuss how the project will fit in with the surrounding context. Does the ADU need to match the style of the main house? What are the benefits of having the ADU be a different style? Are there specific regional materials that could or should be used on the project? What is the local building culture and how would that affect the design or details? What is the climate and prevalent weather patterns and does the design need to respond to those factors?

All of these questions help us develop a strong foundation from which to start our design work. These conversations also allow us to get to know our clients better and share our thoughts and opinions about our ADU design approach. Getting everyone on the same page early on helps avoid going down the wrong path or having to rework designs later on in the process. It also helps us make sure our clients are happy with the end result.

ADU Design Restrictions

Understanding the local rules and regulations that affect ADUs is imperative to a successful project. Many towns and cities have limitations on ADUs, both in terms of size, height and even style. Often there are rules about what materials can be used, or style guidelines related to existing houses on the property. We begin each project by doing research to understand these regulations and documenting any restrictions that could affect the design of the project. We discuss these with our clients to set expectations on what can be achieved. Starting the design process with these in mind helps us develop better designs that meet the requirements saving time and limiting future revisions.

Conclusion

These are just a few of the many design considerations we balance when working on ADU projects. Although ADUs are relatively small in size, they are complicated projects that need a carefully considered design approach. The most successful projects are ones that consider how they relate to the surroundings as well as how people will use the interior spaces. Considering all the various factors and having these important conversations between the design team and clients will only lead to a better project and a more beautiful solution.

It is also important to understand that working through the research, discovery, and design iterations, to end up at the best result takes time. Rushing through these decisions doesn’t lead to a better ADU. It is worth the effort and investment in these early design considerations so your ADU is the best it can possibly be.

Custom ADU Design vs ADU Plans: Pros and Cons


Although most of the projects I’ve worked on have been custom designs for clients, occasionally people have reached out asking about buying a plan set of one of my completed projects. For a variety of reasons, starting with a pre-designed ADU plan can be a great option for some people. Be it to save time, save costs, or simply start with a known commodity, pre-designed ADUs have many advantages. At the same time, I believe in the benefits of designing for the specifics of place and the value that custom design brings to each project. An ADU that responds to the surrounding landscape, the local climate, the conditions of your backyard and main house, and your lifestyle, tastes, and needs can’t be overlooked. To think through what option is best for you and your needs I’ve put together the following pros and cons of Custom Designed ADUs vs purchasing Pre-Designed ADU Plans.


WalzADU-JoshPartee-9087-SMALL.jpg

Custom ADU Design - Pros

  • A designer guides and advises you along the way, helping you make the best decisions for your project.

  • You get a project designed specifically for your needs and that fulfills your goals and ideas.

  • A custom design responds to your property, existing house, the landscape, and context.

  • Style is variable based on your taste.

  • All of the design decisions are made together with your input - you can participate in selecting materials, fixtures, systems, etc. that meet your needs, taste, and lifestyle.

  • Options are limitless - each aspect can be tailored for you.

  • The design process can be a lot of fun as we work through various layouts and design ideas.

  • The design team can help facilitate the permitting process, the selection of the General Contractor, and assist during the construction process.

Namaste+ADU+-+PLANS_Page_03.jpg

Pre-Designed ADU Plans - Pros

  • Can save a significant amount of time - we find the custom design process for an ADU typically takes about 4 months before submitting for permit review.

  • Can save costs, potentially tens of thousands of dollars - custom design fees can be approximately 10% of your project budget.

  • You can see what you are getting before you buy - it is more like buying a product rather than a service.

  • As soon as you purchase the plans you can get a pretty accurate cost estimate for the project from a general contractor fairly quickly.

  • The design has been tested through built projects - you are not the guinea pig.

  • It takes less mental energy. Most of the decisions are already made so you can focus on other things you enjoy in life.


Custom ADU Design - Cons

  • The design process takes a significant investment of time to work through all the various decisions.

  • Design fees are an investment and will be higher than the cost of purchasing a pre-designed plan. (We recommend budgeting 10% of your project budget for custom design fees).

  • It is difficult getting an accurate cost estimate until the design work is complete.

  • You don’t know exactly what the project will look like until you hire a designer and work through the iterative design process.

Pre-Designed ADU Plans - Cons

  • Making changes to the design adds cost and time.

  • Each location has different rules regulating ADUs, so you have to make sure the predesigned unit will work for your location and property.

  • You are on your own to work through the permit process and select a General Contractor for your project.

  • The design is not specific to your property or local climate.

  • You may be compromising on the design - you pick from what is available rather than what is the perfect solution for your goals, ideas, and property.


As you can see, there are definitely benefits and drawbacks for each approach. It really depends on what your goals are, what the end use of the project will be, the specifics of your property, and your budget to determine which is the best option for you.

Typically we recommend custom designed ADU for those who have challenging properties - steep slopes, lots of trees, tight spaces, etc. - or for those who want something more bespoke and luxurious. If you are building an ADU for an aging family member, or are planning to downsize and move into the ADU yourself, a custom designed approach will best serve your needs, goals, and lifestyle.

On the other hand, if you are working with a tight budget, are building the ADU to use as a rental property, or have a simple property that is easy to build on, a pre-designed ADU plan is a great way to get a head start on the project. A pre-designed option is also great if you like DIY projects, are comfortable handling some of the research, or want to take on the permitting and/or construction process yourself. These are also great for builders who are looking for plans to start with.

Either way, we believe that ADUs are great project types and we encourage everyone to consider how they can benefit your life. We also want to make these projects accessible to people of all income levels and property types. That is why we believe that there isn’t a right or wrong way to approach these projects. If pre-designed ADU plans makes a project attainable for you then it is a great way to go. If you have the time and resources to invest in a custom design that is tailored for your specific wants and needs, then it is well worth the investment to go the custom design route. Either way, we would be excited to help you build an ADU and are happy to offer both options for your consideration.


Who do we design for? What do we design for?

We design for the experiences you will enjoy in your home once it is finished. Our work isn’t about the object but rather about the outcome. When you hire us, we lead you through an iterative design process to craft the best home to meet your goals, ideas, and needs. The result of our work is not just a house, but rather it is a place for you to enjoy shared experiences, emotions, and memories.

We design for you and your family, your friends and relatives, and all of the people who will call that house home over the years. We design for your children and grandchildren to have a space for play and exploration, a place to learn and grow, a place of belonging and joy. We design to make you feel relaxed, comfortable, and warm. We design to make you feel welcome, safe, and secure. We design for dogs who want a space to lie next to the fire. We design for cats who wander looking for the perfect location to stretch in the sun. We design for you to experience the passing of time through light and shadows moving across the floors and walls, notches on a door frame marking growth, and the changes each season brings to the surrounding landscape.

Although the house itself is an object and of course we want it to be beautiful and functional, it is our job to design for what happens within the house throughout its lifespan; the feeling you have when you return home from a long day at work, the joy of friends gathering for a shared meal, or the relaxation that washes over you when you escape the city to your weekend getaway. It is these moments that define our work.

We don’t design objects, we design experiences. Architecture isn’t about the physical house. Our work is about what each home will do for you and all the others that will spend time there. The result of our design process is the feelings and experiences you have enjoying life in your new residence with all of your friends, family, and loved ones. These outcomes are what makes us love what we do and what makes the process of design worthwhile.

Who do we design for?

We design for all of the people who will call each house a home. We design for everything that will occupy the space over time. We design for the landscape and the environment that surrounds each home, the ecosystem we are all apart of.

What do we design for?

We design for the emotions, experiences, and memories people will enjoy within their custom homes. Our work isn’t about the object but rather the life that happens within what we create.

Rendering of the interior of the Hill House. Floor to ceiling windows connect the room to the surrounding landscape while a courtyard garden carved into the house brings light and nature deep into the interior. High ceilings and a minimalist aesthet…

Rendering of the interior of the Hill House. Floor to ceiling windows connect the room to the surrounding landscape while a courtyard garden carved into the house brings light and nature deep into the interior. High ceilings and a minimalist aesthetic make the spaces feel open and bright.

Video: ADU Costs - What we can learn from Portland

I was interviewed by Ryan O’Connell from How To ADU about the cost of designing and building ADU projects in both Portland (and across Oregon State) and in the Bay Area (and across California). You can watch the interview below.

How To ADU has a ton of great resources, articles, and videos about ADUs. It is a great place to learn more about these projects. If you are considering an ADU but want to learn more check out their site (or of course you can contact me as well).

There are a few other ways you can get started with an ADU project. I offer custom design services for clients looking for beautiful and sustainable ADU projects. I love working with clients who want to create high quality spaces and don’t want to sacrifice on quality.

I also sell pre-designed ADU Plans for people who are looking to save time and money and who can’t afford fully customized design. There are over 15 different designs and plans available that can work for almost any need. Click the button below to shop for the plan that fits your specific needs.


Frequently Asked Questions about Designing and Building Custom Homes

How does the design process work?

We have a set design process that we lead you through in order to deliver the best results. We break down each project into 5 phases so there is a clear and predictable path that each project moves along. We have outlined this process in detail in another post. Click the button below to learn more.

How long does it take to design a Custom Home?

This can vary greatly from project to project depending on the specifics of the property, the size of the home, and the clients. If you can make decisions relatively quickly we can design a home in 6-9 months. If you want to take your time and deliberate longer on decisions than a 1-year design timeline is a good rough estimate. Keep in mind, this is for the design work. The permitting review and construction process would be added on to these estimate. For a rough order of magnitude you can anticipate 1.5 to 2 years total from start to finish. As we mentioned in our Value statement, we want to serve the best interest of our clients and that takes time. Like the growth of the slow food movement as a pushback against unhealthy fast food, we believe quality is vital and working diligently through our process leads to the best results. And the best results take time.

How much does it cost to build a custom home?

We expanded on this in more detail here. However, as a quick estimate you can assume a custom home would start at around $1 million and go up depending on the size, the site, the quality of materials, systems, and other elements in the project. Your overall budget is really about your goals and ideas and how much you want and are able to spend on the project. We have design small homes, ADUs, that were around $300,000 and we have designed full custom homes for $1,000,000. Larger, higher-end, homes are easily $2 million or more. It really depends on what you are specifically looking for. We start our design process by interviewing you to better understand your wants, needs, goals, ideas, and lifestyle so we can deliver a project that is unique to the specifics of your life and property.

What is included in the design fee?

When any client first contacts us we listen to their goal and ideas, we then ask questions to get an intimate understanding of what they want and need, and what their lifestyle is so we can best craft a solution. Based on this analysis of the uniqueness of your project, we develop a proposal that is specific to your project and the value we can provide as designers and advisors. We also offer tiers of services that you can select to best serve your needs, expectations, and budget. This is a long way of saying, “it depends.”

Generally speaking, our design fees cover Predesign, Schematic Design, Construction Documents, Permitting, and Construction Administration. These are the five phases we guide each project through from our first meeting to handing you the keys to a beautiful custom home. You can learn more about what each of the phases covers by reading the Design Process post linked above.

What other expenses should I expect?

Outside of the design fees there are a handful of expenses that you need to consider. First is the construction cost, of course. This would be the cost of materials and labor paid to the General Contractor. There will also be a handful of consultants needed to complete your project. This includes a surveyor, structural engineer, perhaps a Civil Engineer and Geotechnical engineer (these depend on the property and full scope of design work), arborists, and landscape designers. There may also need to be energy consultants or other special consultants depending on the local requirements.

Other than construction costs and consultant fees, the other major expense will be the Permitting fees assessed by your local jurisdiction. Each city and town is different and has different fee structures so we will conduct that research and report on estimated permitting costs during our Pre-design phase.

How will I know that I will like the end result?

Design is an iterative process and involves sharing ideas, discussing your style, taste, preferences, needs, and wants. It is our job to listen to you, learn about your lifestyle, and understand what you are looking for and then transform that into a design of your custom home. Throughout the design process you will sit down with us as we present design ideas, floor plan layouts, and other drawings to describe the look and feel of your home. Together we will talk through pros and cons of different options and actually sketch ideas as we refine the design into a beautiful home that reflects your values. This iterative process has led to successful designs that our clients love as well as designs that have been recognized and won awards from the design community.

It is also recommended that you look through our portfolio, follow our instagram account, and make sure that our style and values are aligned with what you are looking for. We tend to design modern or contemporary styled projects that are connected to nature and influenced by the landscape around them. If you are looking for a craftsman style suburban home we probably aren’t the right designer for you. However, if you like the work you see on our website, I’m confident that we can design a beautiful project that you love and are proud to call home.

What drawings are included in your services?

There are two main drawing sets that are created during our design process. There is the Schematic Design set and the Construction Documents set. Each has their own specific drawings that are included. For the SD set we include a site plan, floor plans, elevations, sections, and 3D views to describe the design intent. However, to arrive at the final drawing package we do a lot of drawings as we present options and work through the iterative design process. There are a series of plans, elevations, 3D views and hand sketches that we create and use to talk through design ideas along the way.

The Construction Documents Set includes all of the drawings that are needed to both receive a permit from the local building department as well as the information needed for a General Contractor to bid and then build the project. This includes but is not limited to: general notes, a detailed site plan, dimensioned floor plans, building elevations, building sections, foundation plans, reflected ceiling plans, enlarged floor plans, interior elevations, assemblies, schedules, construction details, finishes, fixtures, and equipment lists, and structural engineering and other drawings provided by the consultant team.

Who manages the permitting process?

It is part of our standard scope of work to oversee the permitting of our projects. This includes compiling the permit drawings, filling out permit applications, and submitting all of this to the local building department. We then follow up to respond to any review questions or requests for additional information. There may be a few forms you are required to sign as the project owner, but otherwise we manage the process on your behalf.

Do you have experience working in my local area?

I have worked across the country and around the world and have had success on projects regardless of location. I worked remotely on a project in northern Alberta and I worked with communities as far away as rural Japan. I lived and worked in Thailand, China, and Germany. In earlier years I worked on the design of train stations in Russia, renovations in Berlin, and ADUs in Seattle and the Bay Area. I’ve lived and worked in Portland, Oregon and designed over 100 projects across Oregon. My home base is currently Brooklyn, NY but I travel frequently for work and pleasure. The point is, I may have some experience in your area but I also know how to work in different locations. Regardless of the location of the project, I do the research needed to understand the local rules and regulations, the local permitting process. I collaborate with local contractors and craftspeople, and of course I visit the site to understand the unique aspects of your property and the surrounding landscape.

Do you stay involved during construction?

Absolutely. It is vital to have your designer follow the project through to completion. There are always some adjustments when translating drawings into a built home and we are there to help answer questions, make suggestions, and observe that the construction is following the design intent. I will be an advocate for you during the construction process to get a high-quality home that aligns with the values and design ideas we worked on throughout our design process. A designer stepping away during construction is irresponsible and doesn’t have their client’s best interest at heart. Construction Administration is an important part of our standard services for all residential projects.

Do you have builders/General Contractors you can recommend?

Recommending contractors is part of our services. Working with trustworthy, high-quality contractors and craftspeople is key to the success of a project. In places where we have already completed projects we can recommend people we had great working relationships with. In new locations we do an extensive search to find qualified contractors to collaborate with. This means reviewing contractor websites, talking to local designers, architects, and engineers to get recommendations. We reach out to the companies that have a good reputation and interview them and ask for references to follow up with. Ultimate we typically recommend about 3 companies for each project and have you meet with them. It is important that you meet and get a good feeling for the contractor as they will be a big part of the success of your project. We want to make sure you have a good feeling about them and they are both excellent communicators and have the experience needed to build a finely crafted home.

Can we make changes to the design during construction?

Changes during construction are not recommended. Change orders are often what causes budgets to get out of control. It is always much more expensive to make changes during construction than working out design options on paper. It is also important to consider that there are many factors that influenced what was design. Changes during construction can affect structural systems or may not meet codes that were considered during the initial design. Even when contractors make suggestions for changes in order to save money, we find that often it ads as much expenses and what they think they will save. Major changes require additional drawings and details to document what is changing and need to be reviewed by the jurisdiction as a permit revision. And even small changes can cause delays and additional costs. For these reasons we highly recommend that once construction begins we all stick to the original design.